There are four basic types of brake pads used on today's vehicles. Semi metallic pads, ceramic pads, organic pads, and low metal NAO pads, make up the choices when looking for new brakes. There are two essentials to installing new brakes that are a must for ensuring the quality of the job. The first essential is proper installation, which includes knowing where each part goes, as well as the torque specifications for the particular vehicle you are working on. The second essential is proper lubrication of parts. Lubricating the brake parts is a key function to reducing or eliminating the noises or "squeaks" that brakes can otherwise make.
Loosen the lug nuts on the end of the car from which you are hearing the brake noise. Lift that same end of the vehicle off of the ground, using a 2 ton jack or one with greater capacity. Place jack stands beneath the lower control arms or suspension arms on either side of the vehicle, just inside the tire and wheel assemblies. Do not attempt this project on a jack, as the jack could roll, tip, or collapse. Remove the lug nuts and wheel assembly completely from the vehicle.
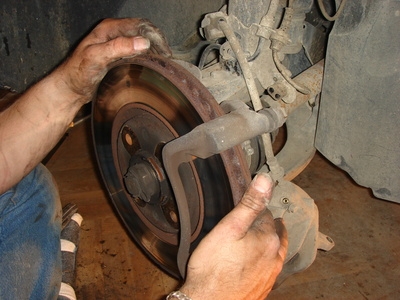
Remove the caliper mounting bolts from the inside of the caliper, using a 3/8-inch drive ratchet and socket. Pry the caliper halfway off of the caliper mounting bracket, using a pry bar. Insert the pry bar between the inside pad and the backside of the rotor. Push the handle of the pry bar outward to compress the the caliper piston inward slightly. You do not need to compress the piston completely, as you are not installing new or thicker pads back onto the vehicle. Remove the caliper completely from the vehicle.
Remove the brake pads from the caliper mounting bracket, and set them on a concrete or solid surface. Spray both sides of the brake pads with aerosol brake cleaner, in order to prep the brake pad surfaces and rid them of dirt and brake dust.
Apply a thin coating of caliper grease to the rear of the brake pads. The rear of the pads is the side that faces outward on either side of the rotor. Do not get grease on the contact surface or grainy surface of the pad. Grease the ends of the pads, where they contact the caliper bracket. There are little "teeth" like protrusions on the ends of the pads, where they contact the bracket. Reinstall the brake pads on the front and rear of the caliper bracket.
Remove the caliper slide tubes from the caliper. On the inside of the caliper where you removed the bolts, there is a little rubber boot. Remove the metal tube by pushing it with your fingers, until it protrudes from the other side of the boot. Remove the tube completely. Pack the rubber boot full of caliper grease using your finger. Insert the little metal tube back into the rubber boot, placing your finger over the opposite end so that all of the fresh grease does not just come out the opposite site. Lubricate both the top and bottom caliper slides in this manner.
Reinstall the caliper onto the brake assembly, and tighten the caliper mounting bolts. Use a 3/8-inch ratchet and socket to tighten the bolts to between 60 and 80 foot-pounds of torque. Spray the entire brake assembly down, until it is saturated in brake cleaner. Try not to spray the backs of the pads you just lubricated though.
Repeat steps 2 through 6 to complete the proper lubrication of the second side of the vehicle. The process needs to be performed on both sides of the vehicle to ensure that the other side does not start to make noise once the first side is properly functioning. Lubricating all of these parts will dampen the noise from semi metallic brakes.
Reinstall the wheel onto the vehicle. Tighten the lug nuts so that they are snug. Raise the vehicle on the jack and remove the jack stands. Lower the vehicle. Tighten the lug nuts to the manufacturer's recommended torque settings, which can be obtained through your local dealership.