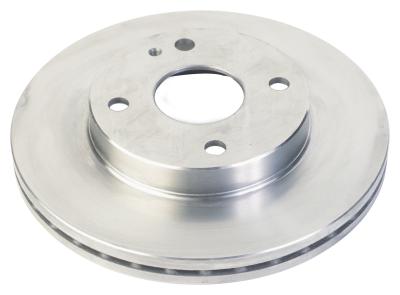
The term "runout" is used to describe the amount of wobble occurring when an element rotates. In a disc braking system, the brake rotor runout must be minimized so that the brakes do not shake and vibrate when engaged. Measuring the runout will allow a service technician to determine if the rotors are warped or improperly installed, allowing corrective action to be taken. With proper tools and a knowledge of how to properly measure the rotor runout, this is a job that amateur mechanics can tackle themselves.
Park the car on a firm and level surface. Put automatic transmissions in “Park” and put manual transmissions in either first or reverse gear. If servicing a front wheel, set the parking brake and securely block the rear wheels. If servicing a rear wheel, leave the parking brake off but securely block the front wheels to prevent the vehicle from accidentally rolling. Loosen the lug nuts about one full turn each and jack up the car. Support the car securely on an axle stand. Completely remove the lug nuts and pull off the wheel.
Remove the two caliper bolts. Grasp the caliper and rock it back and forth a few times to spread the brake pads a little and then lift the caliper up and off the disk. Hang the caliper out of the way, using a wire or bungee cord, taking care not to stretch or kink the flexible brake hose.
Thoroughly clean the disc surface with brake cleaning fluid and wipe down with rags and allow to dry. Mark the face of the disc around the rim at 45-degree intervals, using a felt-tip marker. Number the marks from one through eight.
Place the dial indicator on the dial-indicator stand and position the stand so that the dial-indicator probe contacts the disc surface at a point about 1/2 inch from the rim of the disc. Rotate the disc until mark No. 1 is at the probe and then zero the indicator. Record this on a piece of paper.
Rotate the disc until mark No. 2 is at the dial-indicator probe. Check the runout measurement on the indicator and record it on a piece of paper. Continue this process until you have measurements at all eight marks.
Determine the difference between the highest and lowest measurement. This is the rotor runout. Compare this number to the manufacturer's limit found in the shop manual or aftermarket equivalent repair manual. These are usually available at the local public library or can be purchased at many book stores. As a general rule, the runout should be no more than .002 inches for passenger vehicles and .003 for light trucks and large SUVs.
Excessive runout can sometimes be cured by removing the disc, rotating it until the lug bolts line up with the next hole over and reinstalling the disc. It is important that the hub be immaculately clean before the disc is installed. If the runout is still excessive, then the disc can be shimmed with special tapered brake-disc shims to even it up. In other cases, resurfacing the disc can bring the runout back below the manufacturer's tolerance. If the disc is damaged or warped, it must be replaced.
Reassemble the brake by following the steps in reverse order. Test the brake operation before driving normally.