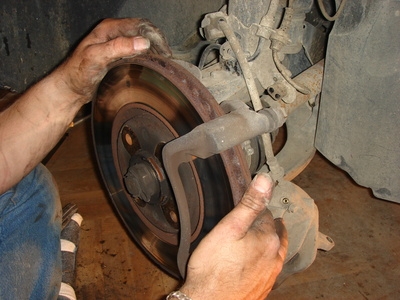
You generally remove the rotor on a PT cruiser when replacing the rotor, caliper or a wheel bearing. The rotors on the PT wear thin over time, causing them to lose needed friction-reducing qualities and wearing brake pads out sooner. Removing the rotors on the PT Cruiser should take no longer than two hours if you have never done this type of work before. You will find all of the tools and materials needed for this project at an auto-parts store.
Lift the front end of the PT Cruiser. Set jack stands beneath both lower control arms. Remove the wheels from the vehicle.
Locate and remove the caliper mounting bolts on the back side of the caliper. The caliper is the part that squeezes the pads onto the rotor.
Pull the caliper halfway off the brake rotor. Place a pry bar or flat-head screwdriver in the hole that is in the middle of the caliper. Retract the caliper piston by prying against the back of the rotor.
Remove the caliper completely and set it on the lower control arm. Do not let the caliper hang freely, as you can damage the rubber caliper brake line or the caliper fittings.
Remove the brake pads from the caliper bracket. Remove the caliper bracket mounting bolts, located behind the rotor, using a 3/8-inch drive ratchet and socket combination.
Remove the rotor by pulling it off the axle hub.