The Dodge Intrepid was a full sized front wheel drive sedan produced from 1993 to 2004. Because of the size and weight of the Intrepid it utilized disc brakes on both the front and rear axles. These disc brakes utilize a pad comprised of friction material bonded to a steel backing plate. Over time, the friction material can wear away and the pads will need to be replaced. The manufacturer recommends replacing the pads on both front and rear wheels. If you hear a screeching or grinding noise whenever you apply the brakes your pads could need to be replaced, and waiting too long could damage the rotors.
Park the vehicle on a level surface.
Place wheel chocks in front and behind the rear wheels and tires.
Set the parking brake.
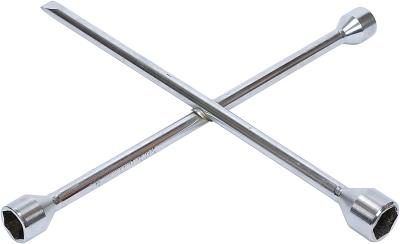
Loosen the lug nuts on both the front and rear wheels using a lug wrench. Do not turn the lug nuts more that one turn.
Raise the front of the vehicle, using a floor jack and support with jack stands placed underneath the front frame.
Lift the rear of the vehicle. Begin by positioning a floor jack underneath the rear frame. Raise the jack, then place jack stands underneath the rear frame. Lower the jack.
Unscrew the lug nuts on both the front and rear wheels using a lug wrench. Lift all four wheels off the lug studs and move them out of the way.
Open the master cylinder reservoir and siphon about 2/3 of the fluid out using an old turkey baster. You cannot use the baster for food ever again.
Position a C-clamp over the brake caliper. Position the bottom of the clamp on the inboard side of the caliper. Position the top of the clamp on the outboard brake pad. Compress the C-clamp to drive the caliper piston back into its bore.
Unscrew the two screws that secure the brake caliper to the steering knuckle, using a socket. Do not remove the banjo bolt that secures the hydraulic brake line to the caliper.
Lift the caliper off the brake disc using your hands. Do not put stress or allow the caliper to hang from the hydraulic brake hose.
Pull the brake pads from the caliper using your hand.
Pull the guide pin bushings from the caliper, using your hand. These are the bushings that the caliper retaining bolts slide through.
Coat the outside of the guide pin bushings with a multipurpose grease before reinserting them into the brake caliper.
Press the new pads into position in the brake caliper. Be sure the steel clip on the inboard pad fits into the caliper piston. Fit the steel clip on the outboard pad over the tabs on the outside of the caliper.
Drop the caliper into position over the brake pad.
Screw in the two bolts that secure the caliper to the steering knuckle, using a socket.
Lift the wheels onto the lug studs, and screw on the lug nuts using a lug wrench.
Lower the vehicle.
Retighten the lug nuts using a lug wrench.
Check the fluid level in the master cylinder reservoir. Add brake fluid as necessary.
Pump the brake pedal until pressure builds in the brake system (five to seven times). This will reset the pistons inside the brake calipers.
Check the fluid level in the master cylinder reservoir. Add brake fluid as necessary.