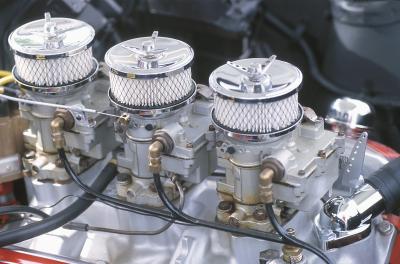
Tuning a Rotax two-stroke carburetor follows many of the same principles as tuning other two-stroke carburetors. The owner needs to adjust the various control needles inside the carburetor to obtain the right mix of fuel and air for engine performance. Because this mixture will vary in performance versus the environment of use, tuning provides the necessary changes to accommodate the differences. Unfortunately, no hard science exists for every situation, so tuning must occur regularly for high-performance results. On the other hand, tuning is not needed as much for regular, daily driving.
Disconnect the Rotax carburetor from the engine using a screwdriver to loosen the hose clamps and intake manifold mount. Disconnect the looped throttle cable from the top of the carburetor. Use a crescent wrench to open the carburetor top if necessary. Place a shop rag around the carburetor to catch any leftover fuel that spills out of the carburetor when handled.
Turn the carburetor assembly upside down so the bottom float bowl is facing upward. Use a crescent wrench to loosen the securing bolts on the bowl. Remove the bowl when the bolts are loose and removed.
Loosen and remove the various jets underneath the carburetor body. Place them in a cup so as not to lose them. Spray carburetor cleaner in each jet cavity to clean out any gunk inside. Turn the carburetor over to let the solvent drain out onto a shop rag.
Examine each of the jets to determine if they are plugged up. Spray them with the carburetor cleaner if so. Reinstall the idle and choke jets first, tightening them in place with a screwdriver.
Examine the carburetor's main jet. Replace the main jet tip with a bigger model if your engine is running lean with not enough gas at high speeds. Do the opposite and replace it with a smaller jet tip if the engine runs with too much gas. Place the main jet assembly into the carburetor once modified and tighten it with a screwdriver.
Replace the float bowl gasket with a new one and tighten the bowl into place again. Turn the carburetor right side up. Unscrew the air screw and pilot screw on the sides of the carburetor. Clean them out with cleaner and reinstall them again. Twist the pilot screw all the way in and back out by four turns. Do the same with the air screw but back it out by at least two and half turns.
Reattach the carburetor to the intake manifold. Reconnect the fuel line. Reconnect the throttle cable to the top of the carburetor. Turn the engine on and let it idle. Adjust the pilot screw until the engine idle is running smoothly with a constant tick-over - i.e. not sputtering or running fast.
Take the vehicle for a drive. After 30 minutes pull over. Use a socket wrench to remove a spark plug. Hold it in your hand with a shop rag because it will be hot. Look at the spark plug tip. Return to your work place and repeat Steps 1 through 7 if the plug looks oily black (too much gas) or chalky white (too little gas). Continue driving if the plug is chocolate brown (correct mix).