The exhaust gas recirculation (EGR) system in your Dodge Stratus comes equipped with a valve and a transducer that work together to introduce small amounts of exhaust gases into the cylinders. Although you can remove the valve and the transducer as separate components, Chrysler recommends replacing both as a single unit when installing a new valve or transducer since they are calibrated to work together. With a minimum of tools, you can perform this repair job at home and install the new EGR valve and transducer in minutes.
Open the hood of your Stratus and locate the EGR valve and transducer on the rear of the engine. Next to the oil filler cap, you will see a round, flat plastic component about 3 inches in diameter. This round component has a small plastic cylinder on top. This is the EGR transducer. The cylinder has an electrical connector on one end and a thin vacuum line on the other end. Two thin rubber lines are connected to the transducer. If you follow these two lines, about 6 inches in length, you will find the EGR valve connected to them.
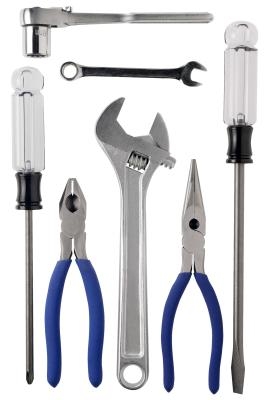
Detach the negative (black) battery cable with a wrench. Depending on your particular model, you might need to remove the air cleaner assembly -- which houses the air filter -- for better access to the battery and EGR valve. Use a Phillips screwdriver, a ratchet and socket.
Unplug the thin vacuum line and electrical connector from the cylinder on the EGR transducer by hand.
Unplug the two vacuum lines connected to the EGR transducer. If you are replacing the transducer, you can cut the plastic tie holding the component to the engine using a pair of diagonal cutting pliers and then unfasten the mounting bolt with a ratchet, short ratchet extension and socket and remove it from the vehicle.
Unfasten the two bolts that hold the EGR valve to the tube and the two valve mounting bolts, if you are replacing the valve. Use a ratchet and socket. If you are working on a 2.5L engine model, first unfasten the bolt securing the 60-way electrical connector to the transmission control module (TCM). This is the metal box with the fins on top located in front of the EGR valve. Then remove the four TCM mounting bolts and remove the module to gain access to the EGR valve. Use a ratchet, small ratchet extension and socket.
Remove the gasket from the engine-mounting surface of the EGR valve and clean the surface with a shop rag.
Position the new EGR valve in place, along with a new gasket, if you removed the valve for replacement. Fasten the two valve mounting bolts and the two bolts to secure the valve to the tube.
Install the TCM and secure the four mounting bolts with a ratchet, small ratchet extension and socket, if you are working on a 2.5L engine model. Plug in the electrical connector to the TCM and secure the connection with the mounting bolt using the ratchet and socket.
Position the new EGR transducer in place, if you removed it for replacement. Fasten the mounting bolt with the ratchet, short ratchet extension and socket. Connect the two vacuum lines from the EGR valve to the transducer.
Connect the thin vacuum line and the electrical connector to the small cylinder on top of the transducer by hand.
Attach the negative (black) battery cable with the wrench. Reinstall the air cleaner assembly, if you had to remove it. Use the Phillips screwdriver, ratchet and socket.