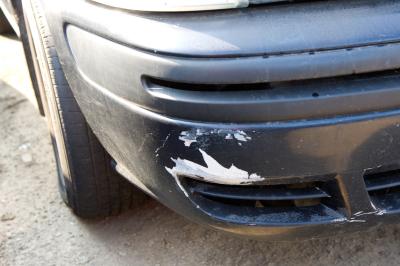
Body kits are aftermarket parts that replace the front bumper, side skirts and rear bumper of a car or truck. Body kits are usually damaged by hitting an object on the road or by getting too close to a curb, causing rips or nicks. In other cases a bolt hole can be ripped and made larger so that the bolt no longer holds the kit to the car. You can fix the damage to make the body kit functional and stylish again.
Use the 180 grit sandpaper to sand the damaged area, including the edges of any rips or tears in the body kit. Sand until the area is smooth and no jagged edges are remaining.
Apply a thick coat of flexible body filler to the damaged area using a squeegee to spread the filler. Let the filler dry for 30 minutes before sanding it smooth with more 180 grit sandpaper. Sand until the filler is level with the surface of the body kit.
Sand the filler using 220 grit sandpaper. Sand lightly to remove the deep scratches left by the 180 grit paper. Sand the filler and surrounding area with 600 grit sandpaper to remove the scratches left by the 220 grit sandpaper. Sand one last time using 800 grit sandpaper. This fine grit sandpaper makes the area smooth and ready for paint.
Place masking paper and tape around the surrounding areas so that paint overspray doesn't end up on parts that don't need to be painted. Only about 2 feet around the damaged area needs to be covered.
Spray the repaired area with a coat of primer. Hold the can six to eight inches from the surface and move the can left and right. Let the primer dry for thirty minutes.
Apply four thin coats of paint to the area, keeping the coats light to avoid runs in the paint. Use the same spray techniques as with the primer. Let each coat dry for five minutes. Add three thin coats of clear coat paint on top of the color coats of paint. Allow six hours for the paint to dry completely.