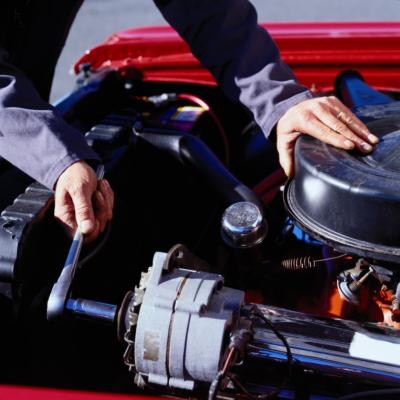
The 5.7-liter or 350 cubic inch Chevrolet engine is one of the more popular Chevrolet engines. You can find this engine in many of the muscle cars of old, such as the Camaro and the Chevelle. Chevrolet kept the engine over the years, upgrading it to fuel injection, for its mid- and large- cars and trucks. The newer, fuel-injected vehicles have a two-piece intake manifold. A gasket is sandwiched between the upper and lower intakes. To cure a leak between the upper and lower intake manifold, replace the gasket between the two.
Disconnect the negative battery cable, using the appropriate wrench. Set it aside, ensuring that it does not touch metal. Loosen the clamps on the air duct, using the screwdriver. Pull the duct off the air cleaner box. Remove the wiring harness connectors and brackets from the intake, using the appropriate sockets, then move the wiring harness out of the way.
Disconnect the throttle linkage and bracket from the intake, using the appropriate socket. If your vehicle has cruise control, disconnect the cruise control cable and set it aside. Pull the PCV valve and hose off the intake or valve cover, depending on your year, make and model. Remove the fuel lines from the rear of the intake manifold, using the appropriate line wrench. Remove their brackets, using the appropriate socket.
Remove the wiring from the ignition coil, using the appropriate wrench. Unbolt and remove the ignition coil and its bracket, using the appropriate socket. Unplug the purge solenoid, then remove it and its bracket, using the appropriate socket. Working from the front of the engine, and starting on the passenger side, number the intake manifold bolts, using the marker, starting with 1. Continue numbering the bolts around the back of the engine and down to the front driver's side of the engine.
Remove the bolts and intake manifold, using the appropriate socket. Clean the gasket-mating surfaces of the upper and lower intake manifolds, using the plastic scraper and shop rags. Be sure you don't leave any gasket debris in the lower intake manifold.
Fit the gasket onto the lower intake manifold. Position the upper intake manifold onto the gasket and lower intake manifold. Check that you have not pinched any of the injector wires between the two. Insert the bolts in order into the bolt holes. Screw them in by hand as far as they will go.
Tighten the bolts and studs, starting in the center and working in a crisscross pattern to 45 inch-pounds of torque. Repeat the pattern, starting again in the center, this time tightening the bolts and studs to 83 inch-pounds of torque.
Reinstall the purge solenoid and bracket, ignition coil and bracket, and the PCV hose. Reattach the fuel lines and their brackets at the rear of the intake manifold. Reinstall the cruise control cable, throttle linkage and it bracket, and the wiring harness connectors and brackets. Fit the wiring harness into its brackets. Reinstall the air cleaner duct and negative battery cable.