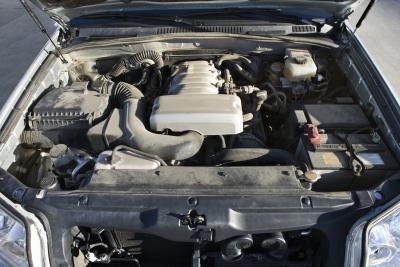
The 2004 Honda Civic may use either a timing belt or chain. The belt comes on a model with a single overhead camshaft (SOHC) engine. This belt's positioning is precise, and any alteration to its position can cause serious problems with the engine operation. This is why changing a timing belt on your own is a very tricky procedure, in addition to the numerous other components you must remove to change the belt. Talk with your mechanic beforehand.
Disconnect the car's negative battery cable.
Raise the front end and support it on jack stands, making sure the transmission is in neutral and the parking brake is on. Remove the left front wheel, then unbolt and remove the splash shield from the engine with your wrench.
Loosen the mounting bolt and locknut for each of the drive belt-operated components (power steering pump, alternator, etc.), then turn the adjuster bolts to loosen the drive belts and remove them.
Unbolt and remove the power steering pump, using your wrench, without disconnecting the lines. Disconnect the wires for the alternator and then unbolt and remove it.
Loosen the coil cover fasteners with a flat screwdriver and remove the cover, then disconnect the electrical connectors for the ignition coils, remove the coils' mounting nuts and remove the coils.
Mark and remove all hoses that are in the way of the valve cover and unbolt and remove the engine oil dipstick. Wipe off the valve cover with a rag, then unbolt and remove the valve cover.
Raise the floor jack with a block of wood on it under the oil pan to support the engine.
Unbolt and remove the left side engine mount bracket.
Remove the spark plug from the number one cylinder with a wrench and spark plug socket, then insert a compression gauge into the spark plug hole.
Turn the crankshaft at the front bolt clockwise with a breaker bar and socket until there is a compression reading on the gauge, then turn it further until the Top Dead Center notch lines up with the pointer on the timing belt cover.
Unbolt and remove the side engine mount bracket, then unbolt and remove the upper timing belt cover with your wrench.
Hold the crankshaft pulley steady with a strap wrench and then loosen the pulley's bolt with a breaker bar and socket. Slide the pulley off the crankshaft.
Unbolt and remove the lower timing belt cover.
Disconnect the electrical connectors for the crankshaft position sensor, then remove the sensor's mounting bolt with your wrench and remove the sensor.
Loosen the bolt on the timing belt tensioner with your breaker bar, push on the tensioner to release the belt tension and then re-tighten the bolt. Slip the belt off.
Line up the holes on the timing belt tensioner pulley and the tensioner base, then insert a 3 mm-diameter pin into the holes to hold the pulley in place.
Install the replacement timing belt by wrapping it tightly around the crankshaft sprocket and then the tensioner pulley, water pump pulley and camshaft sprocket. Loosen the tensioner's bolt by a half turn so it will tension the belt slightly.
Turn the crankshaft counterclockwise by two revolutions and make sure the timing marks and camshaft sprocket index marks are lined up.
Tighten the tensioner mounting bolt to 33 foot-pounds and remove the pin from the tensioner.
Reinstall the crankshaft position sensor, the timing belt covers, the crankshaft pulley, the number one spark plug, the engine mount brackets, the valve cover, engine oil dipstick, ignition coils, power steering pump and alternator.
Reinstall the drive belts, following the exact same path they followed on the pulleys before. Turn the adjuster bolts to set the correct tension, then tighten the component fasteners.
Lower the engine off the floor jack, reinstall the left front wheel and lower the car off the jack stands.
Reconnect the battery cable.