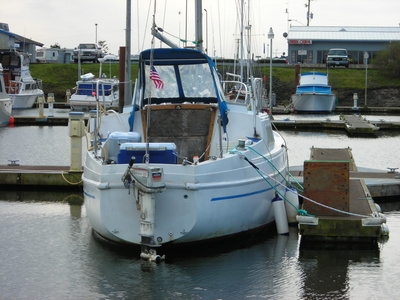
True sailboats ride over the water, their power dictated by the force of the wind currents. This constitutes their main drive power -- the wind. In calm or no-wind conditions, a sailboat can be left helplessly adrift and at the mercy of the currents. Unless they have another means of propulsion, their destiny depends upon the wind currents picking up again. Small sailboats can benefit with the use of auxiliary outboard motor to get them back to port or speed them along in calm conditions. Mounting a motor bracket on the transom of sailboat requires a few considerations and use of some simple hand tools.
Examine the area you wish to install the brackets. If the rudder of the sailboat sits on the center line of the transom, you will need to fit the motor mount and bracket to one side of it. Measure the width of the bracket clamp width with a tape measure, making certain it fits within the narrow margin between the rudder and outside edge of the hull. Extend the rudder full left and full right to gauge the distance of rudder travel.
Inspect the slant on the transom of your sailboat. The adjustment positions on the bracket should allow the motor to sit upright when fully deployed in the water. Measure the distance between the approximate bracket location on the transom and the top of the outboard motor cavitation plate with a tape measure. The water inlet on the lower unit of the outboard motor should sit at least 2 inches below the waterline, while the exhaust port must sit at least 2 inches above the waterline.
Place the motor bracket in position on the back of the transom slightly above the transom mid-section. Check the inside of the transom for any structural runners or obstruction. You want an open area on the inside of the transom. Mark the drill holes through the mounting bracket holes with a felt pen. Mount a drill bit on a drill motor chuck with the same diameter as the mounting bolts.
Center the drill bit on the felt marks and drill the four holes through the transom. Place the motor bracket over a square piece of 3/4-inch marine plywood. Draw an outline of the bracket on the plywood with a felt pen. Leave enough outside lip on the plywood to allow the bolts to sit at least 1 inch inside the bracket outline. Cut the plywood with a jig saw, or handsaw, to the proper square dimensions.
Lay the bracket over the plywood motor mount and center it. Mark the mounting holes in the plywood with a felt pen. Drill the four holes through the plywood with the drill. Apply some marine adhesive caulk with a small brush on the inside of the transom where the plywood mount will sit. Apply adhesive to one side of the plywood mount. Stick the plywood mount to the inside of the transom and align the holes.
Brush some marine adhesive caulk on the underside of the motor bracket. Place four spacer-washers on four stainless steel bolts. Place the bolts through the motor bracket and lift the bracket up against the transom. Guide each bolt into their mounting holes on the transom and push the bracket forward against transom. The bracket should stay. Place four spacer-washers on the extruding bolts on the inside of the transom. Place a lock washer on each bolt, then a nut.
Tighten all the nuts with a socket and wrench. Clean any excess adhesive that has squeezed between the inside motor mount and the outside motor bracket with a rag. Loosen the tilt and vertical adjusting nuts on the bracket with a socket and wrench. Place the outboard motor on the bracket and tighten the knobs to secure it. Adjust your motor to the proper angle, and tighten the bracket adjusting bolts.