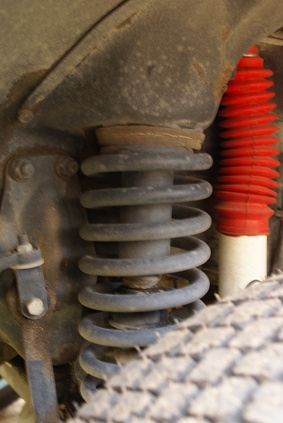
The front struts of a car are important components that keep the vehicle stable and prevent uncontrolled suspension movement. The struts are mounted to the car body with rubber spacers to reduce unwanted noise and vibration, but these spacers can begin to fail after many miles of driving. Upper strut mount wear is a common source for front-end rattle noise on the 4th generation Toyota Camry, and while not normally a sign of major suspension failure, this noise can be very annoying to drivers and passengers alike. Strut mount replacement can be costly and time-consuming, but there is a simple procedure that can often reduce or eliminate this rattling sound.
Make sure the car is parked on a level surface with the engine off and the transmission in Park. Engage the parking brake. Place wheel chocks in front of and behind one rear tire so that they block tire movement. Use the jack to raise the opposite front corner of the vehicle -- raise the passenger front if your chocks are on the driver's rear, and vice versa. Place one jack stand under an approved support point -- see your owner's manual to identify jacking/support points -- and lower the vehicle so it rests on the jack stand. Repeat this process on the other side of the vehicle so that the car is resting on jack stands and both front wheels are clear of the ground.
Open the hood of the car. Identify the upper strut mount on one side of the engine bay. The upper strut mount is a black cylinder-shaped part approximately 1 1/2 inches tall and 3 inches wide with a flat top and a 1 1/4-inch hole in the center. It is located near the outer edge of the engine bay, close to the cowl and windshield area.
Spray silicone lubricant into the upper strut mount center hole, directing the spray through the hole toward the outer wall of the metal housing. Spray the lubricant around the entire inner circumference of the upper strut mount.
Insert one end of the vacuum hose through the center hole of the upper strut mount and use the flat-bladed screwdriver to push the vacuum hose into the gap between the upper strut mount housing and the rubber spacer inside it. Make sure to push the vacuum hose all the way to the outer edge of the upper strut mount housing. Use the flat-bladed screwdriver to continue feeding the vacuum hose into the center upper strut mount hole, laying the hose in a circle around the outer edge of the gap between the strut mount housing and the rubber spacer. When you have inserted the hose almost all the way around the housing, use scissors or a razor blade to trim the hose so that the ends will nearly meet once inside the housing. Finish pushing the hose into place with the screwdriver, and make sure that all of the hose is firmly seated between the rubber spacer and the housing wall. Repeat this process for the strut mount on the opposite side of the engine bay.
Use the jack to raise one front corner of the car, and remove the jack stand. Lower the car to the ground smoothly, and repeat the process on the opposite side of the car to remove the other jack stand. Remove the wheel chocks from the rear wheel, and disengage the parking brake.