The GMC Sierra began in 1962 as the GMC Wideside and the Fenderside. The Sierra name was first used in 1990 on the GMC trucks. The 1991 GMC Sierra was produced with five different engine options. Four of the five engines were gasoline, and would be the only engines with distributors. The 4.3-liter TBI V-6, 5.0-liter TBI V-8, 5.7-liter TBI V-8, and 7.4-liter TBI V-8 engines are all distributor engines.
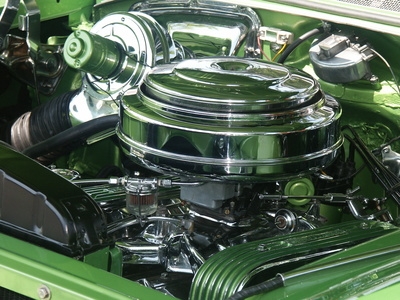
Open the hood of the Sierra. Remove the air cleaner assembly from atop the throttle body by hand. The distributor is located behind the throttle body assembly on the rear side of the engine.
Place a piece of tape around each spark plug wire. Mark the wires while they are on the distributor between 1 and 6, or between 1 and 8 depending on your engine size. Labeling the spark plug wires will ensure that you do not disturb the firing order of the Sierra upon reinstalling the wires.
Remove the distributor cap mounting bolts with a flat head screwdriver, or a 3/8-inch drive ratchet and socket. Adding a 6-inch extension between the ratchet and socket will give you more leverage and maneuverability for the duration of this project.
Remove the engine control module (E.C.M.) from the side of the distributor, using a Phillips head screwdriver to remove the mounting screws. Disconnect the two wire connectors from the E.C.M. by pinching the ends with your thumb and forefinger, while pulling the wires free of the E.C.M.
Remove the distributor rotor mounting bolts from the top of the engine, using a 3/8-inch drive ratchet and socket with a 6-inch extension. Remove the rotor from the engine by pulling the rotor straight upward out of the engine, using a twisting motion in your wrist to wiggle the rotor splines free from the engine. The internal end of the rotor has geared teeth or splines on the end, which sync with the engine to rotate the rotor.
Install the new distributor rotor vertically down into the engine by hand. Use a twisting motion in your wrist to align the splines on the rotor with the engine splines. Make sure your rotor is facing in the same direction as the rotor you removed, in order to ensure the E.C.M. and distributor cap connect in the proper position on the engine. Tighten the rotor mounting bolts down onto the engine so that they are snug. Turn the bolts 1/2-turn more once they are snug. Do not over tighten the bolts.
Install the engine control module onto the distributor by holding it in place, while inserting the screws by hand and starting them. Tighten the screws so that they are snug. You do not need to over tighten the screws or you will risk breaking the mounting tabs on the E.C.M.. Attach the two wire connectors by hand to the E.C.M.
Install the distributor cap gasket atop the distributor rotor. Install the distributor cap onto the rotor and E.C.M. assembly. Tighten the distributor cap bolts down with a 3/8-inch drive ratchet and socket, or a flat head screwdriver. The bolts only need to be snug, so do not over tighten them.
Reinstall the spark plug wires onto the new distributor cap, in the same order in which they came off of the cap. The labels you placed on the wires will guide you to proper installation of the spark plug wires.
Reinstall the air cleaner assembly on top of the engine and fasten the air cleaner nut by hand.