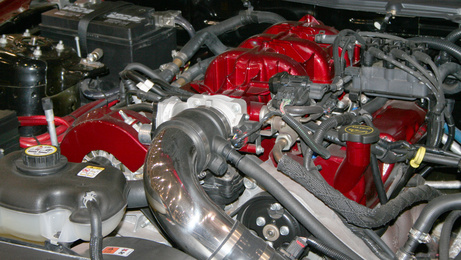
The 1998 Dodge Caravan is part of the third-generation series of this minivan, and typically comes with a V6 engine in varying sizes from 3.0 to 3.8 liter. The main difficulty in removing the engine from your Caravan is to be sure you have disconnected any and all accessories and parts connected to the engine itself. When removing the engine and transaxle (transmission), be sure the vehicle is not rolled or damage to the wheel bearings can occur. Store the bolts, nuts and hardware on the engine components themselves if possible, or in bags taped to them.
Disconnect the fuel pump from the electrical system. The 1998 Caravan has a fuel injector system that is under pressure that must be relieved prior to removal. The relay box is located on the driver's side in the engine compartment, near the fender wall. A diagram inside the relay box cover indicates which relay to remove, a pair of needle nose pliers may be necessary to do this if it does not come out by hand. Relieve the fuel system pressure by turning the engine over several times after disconnecting the relay. The engine will not start but the pump will release the fuel pressure. Disconnect the fuel line with the retaining tabs by squeezing them until it releases.
Disconnect the battery and remove it — always remove the negative cable first. Using the chalk or marker trace the outline of the hood bolts so you can line them up correctly when you re-install it. Remove the bolts and the hood to gain access to the rest of the compartment.
Remove the wiper arm assembly and blades, then remove the cowl cover from the engine compartment. Disconnect the wiper motor unit from the wiring harness. Disconnect the washer fluid hose, drain tubes and attachments such as the sound absorber. Remove the wiper motor unit from the dash assembly and set aside with all corresponding parts.
Loosen and remove the air cleaner ducts. Remove the battery from the engine compartment. Remove the battery tray and vacuum reservoir. The 1998 Dodge Caravan has a rear heater connection to the rear heater unit that needs to be blocked at this time to keep debris from the system
Drain the cooling system by placing one of the drain pans beneath the system and removing the plug. Remove the radiator hoses once drained by loosening the clamps. Remove the wiring harness from the cooling fan then remove the radiator and cooling fan assembly. Remove the heater hoses from the engine and plug them with bolts large enough to stay in place but not stretch the hoses. This keeps debris from getting into the system.
Disconnect the shift linkage for the transmission. Then disconnect throttle body linkage and all vacuum hoses, and remove them. Loosen and remove accessory drive belts. Loosen and remove the air conditioning compressor and the mounting brackets but do not disconnect the hoses from the compressor. This will maintain the integrity of the coolant in the system. Set this unit aside in an area it will not be disturbed.
Detach the alternator wiring harness and remove the alternator.
Jack the vehicle up slide the jack stands beneath the frame to support the vehicle. Remove the right and left transaxle assemblies.
Disconnect and remove the starter motor. Drain the oil into the second drain pan and remove the oil filter with the oil filter wrench. Set aside to be recycled at the local recycling center or oil change location when the job is finished along with the radiator coolant. Remove the splash shields from the right and left of the engine compartment.
Disconnect the exhaust pipe from the manifold, and unbolt the front motor mount, along with the brackets. Unbolt and remove the rear transaxle motor mount and the bracket. Remove the power steering pump and brackets.
Moving in a clockwise fashion, begin detaching and removing the wiring harnesses from the engine. Tape and label them to be sure you know what each is connected to. Now remove the bending braces. Remove the transmission inspection cover, marking the flexplate to torque converter location. Then remove the bolts that attach the flexplate to the converter and remove it. Clamp the converter to the transaxle with the C clamp to keep it from falling out if necessary. Lift the vehicle and remove the jack stands, then lower it to the ground and remove the jack out of the way.
Disconnect the engine ground straps. Attach your engine hoist to the engine with the heavy chain, and remove the right engine mount assembly and left transaxle through-bolt.
Lift the engine and transmission from the compartment slowly with the hoist, watching for any missed wiring harness connections or areas that are not clear.
Remove the transmission (transaxle) from the engine, and secure the engine to the engine stand.