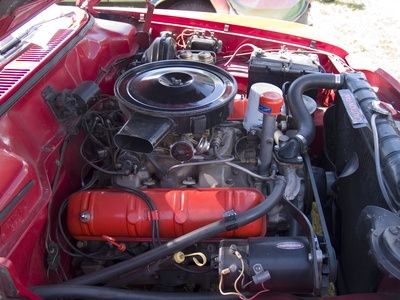
Rochester garnered fame with the Quadra-Jet carburetor, but their two-barrel models were equally praised. The four-barrel design incorporated two huge, secondary throttle bores that allowed an extra-large volume of fuel and air to enter the intake manifold. They were very popular decades ago and can still be found on classic and muscle cars today. Basic in design, they lend themselves well to rebuilding and high-performance modifications. You can swap them out with different makes and designs with the use of adaptor plates. Alternatively, you can simply bolt them back onto their original intake mounts.
Place the vehicle in park or neutral with the emergency brake set. Disconnect the negative battery cable with an end wrench. Unscrew the wing nut on the air cleaner lid and remove the air cleaner housing. Use masking tape and a felt pen to mark all vacuum hoses connected to the carburetor, including the throttle positioner diaphragm (if so equipped), or vacuum advance line. Inspect the hoses for cracks or splits, so you can replace them. Mark any wire locations with masking tape and a felt pen.
Remove any wires from their posts, like the pick-up solenoid or any other sensor wire that belongs to an electronic ignition systems, by manually pulling them from their jack connections. Loosen the hex nut on the pick-up solenoid (if so equipped) with an end wrench and unscrew the solenoid. The solenoid will transfer to the new carburetor or old rebuild. Use a screwdriver to pop off the throttle cable at its ball-and-socket linkage location. If it has a kick-down linkage arm, remove the cotter pin at the carburetor linkage cam and lay the arm down on the intake manifold.
Remove the connection of the choke riser rod by turning the rod and slipping it off the slot of the cam on the carburetor linkage. If equipped with a heat tube from the exhaust manifold to the carburetor, remove the tube nut by unscrewing it with an end wrench. Use a fuel line wrench to loosen the fuel line nut attached to the top of the carburetor (air horn). Put a rag over the manifold to catch any spilled gas. Gently bend the fuel line out of the way.
Use a socket, extension and ratchet to loosen and remove the four mounting bolts on the carburetor base. For a two-barrel Rochester carburetor, remove only the two mounting bolts. Lift the carburetor off the intake manifold. Place rags deep inside the intake manifold. Use a gasket scraper to scrape all the old gasket material off the bottom of the old carburetor and the intake manifold mating surface. Wipe the mounting surfaces clean with carburetor cleaner and a rag. Remove the rags from within the intake manifold.
Place a new gasket on the intake manifold. Place the carburetor over the holes and run the bolts in by hand. Tighten the mounting bolts with a socket and wrench. Screw the solenoid back into its bracket mount and put the hex nut back on. Tighten the hex nut with an end wrench. Screw the fuel line back into the carburetor by hand, then tighten it with a fuel line wrench. Hook up the choke riser rod by slipping the rod back in its slot on the carburetor linkage.
Reconnect the heat tube by screwing the nut back onto its fitting and tighten it with an end wrench. Snap the throttle cable linkage back onto the cam ball socket, using a pair of needle-nose pliers. Refer to the masking tape markers on your hoses and wires, so you can reconnect them back to their proper ports or connectors. Reconnect the kick-down arm, using its cotter pin to secure it to the carburetor linkage.
Place the air cleaner housing over the top of the carburetor air horn and position the snorkel in the proper direction. Place the air cleaner lid on top of the air cleaner housing and tighten the wing nut by hand. Reconnect the negative battery cable. Start the engine and make the necessary idle and mixture adjustments.