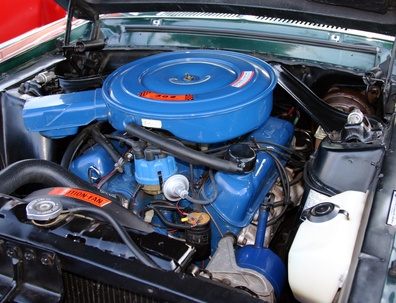
The water pump functions as the heart of the cooling system. The impeller blades within the pump drive the water by force through all of the engine passages, into the radiator, and back again through a continuous loop. Some pumps suffer internal failure and show signs of early malfunction through leaks or general overheating. Water pumps almost never fail suddenly. They wear progressively and show outward signs. An observant vehicle owner can spot such early warning signs and administer repairs before the situation worsens.
Set the vehicle in park and activate the emergency brake. Make sure the engine is not running. Open the hood and locate the front of the water pump. Look for any signs of leakage at the edges of the pump housing flange where it connects to the engine block. Make sure all of the water pump mounting bolts appear intact and that none have run out or disappeared.
If a small leak appears in this area, you can re-torque the bolts according to manufacturer's specifications. This can stop a very small leak. As an added precaution, make sure the heater hose and lower radiator hose clamps have been tightened, using the appropriate screwdriver or small socket.
Run the engine until it reaches operating temperature, then shut it off. Use the floor jack to lift the vehicle, and place two jack stands under the frame near the front wheels. Slide under the front end and examine the underside of the water pump. Most water pumps have a "weep" hole, or a bypass hole that lets water flow through it in case the pump bearings and seals have failed. Dripping water or a rusty appearance at this location indicates a pump shaft or seal failure. You can also wiggle the water pump shaft back and forth, noting if it has excessive play. This indicates bad shaft bearings. If any of these conditions exist, the water pump must be replaced.
Open the petcock valve on the bottom of the radiator and drain the coolant into a pan. Remove the fan shroud (if so equipped) to gain better access to the front of the pump. Loosen and remove any pulley belts in front of the water pump pulley, including the water pump pulley belt. Refer to your owner's manual for the correct removal procedure for your particular make, model and year vehicle.
Disconnect the lower radiator hose and heater hoses at the water pump side, using the screwdriver or pliers. Remove the pulley fan blade (if so equipped) and the pulley on the water pump shaft, using the appropriate sockets.
Remove all of the water pump housing bolts with the correct socket. Pull the pump from the block surface. Use a gasket scraper to clean the gasket mating surface on the engine block. Make sure no old gasket material remains. Apply gasket adhesive to the block mating surface and install the new water pump gasket on it. Align the new water pump to the mounting holes and use your fingers to run the mounting bolts in. Tighten the mounting bolts according to torque specifications (refer to your owner's manual).
Install the components in the reverse order you removed them, or whichever order makes it more convenient. You might start with the hoses first, followed by the fan pulley. Place the belts back onto their respective pulleys and adjust the belt tension according to your manual's specifications. Attach the fan shroud back into its mounting brackets and close off the radiator petcock valve. Fill with coolant. Start the engine and look for any leakage at the pump housing or hose locations.