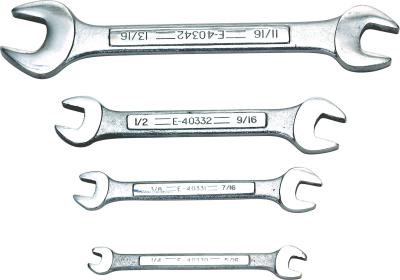
According to Autodata, the 1997 Mitsubishi Eclipse comes with three different engines: the 3.0L GT SOHC, the 2.0L DOHC, which has a balance shaft and the 2.0L DOHC with no balance shaft. All three are interference engines, which means that should the timing belt break or stretch past its useful life, there is a good chance the valve will contact the pistons and cause extreme engine damage. Mitsubishi recommends a timing belt change every 60,000 miles. The 2.0L DOHC engine, with no balance shaft, is the only one that does not need special tools from the dealership.
Disconnect the negative battery cable and lay it to the side, ensuring that it does not touch metal. Raise the Eclipse with the floor jack, and support it on jack stands. Remove the right front wheel with the lug wrench, and the right front fender splash guard, using the appropriate socket.
Loosen the accessory drive belt's tensioner with the appropriate wrench or socket, then lift the belt off the pulleys. Remove the crankshaft pulley bolt, then pull the pulley off with the pulley puller.
Remove the power steering pump by unbolting it from its bracket, but do not disconnect the hoses. Lay the pump out of the way. Remove right engine mount, the mount bracket, and the timing belt cover, using the appropriate sockets.
Turn the crankshaft clockwise until both timing marks line up. The timing mark on the crankshaft sprocket should line up with the mark on the block at the 1 o'clock position. The timing mark on the left camshaft should be at the 3 o'clock position and the right camshaft (as you are looking at the engine) at the 9 o'clock position. The two camshaft timing marks line up with each other.
Loosen the auto tensioner bolts, then remove the timing belt. Finish unscrewing the tensioner bolts, then remove the tensioner. Check the tensioner to make sure it's not leaking oil. If it is leaking, replace the tensioner.
Insert the tensioner in the vise or press and press the pushrod into the tensioner body until the hole in the pushrod lines up with the hole in the tensioner body. Insert an Allen wrench into the holes to hold the pushrod in place. Double-check the timing marks to ensure they are still lined up.
Move the crankshaft timing mark one-half tooth before the top dead center mark, using a socket to turn the crankshaft counterclockwise for one-half tooth. The mark is the dot on the crankshaft where you lined up the timing marks earlier.
Install the timing belt, starting on the crankshaft sprocket and working counterclockwise over the top of the water pump pulley, behind the idler pulley over the top of both camshafts and then behind the tensioner pulley. Keep the belt tight on the water pump side of the engine, allowing slack on the tensioner side of the engine.
Turn the crankshaft clockwise just enough to take up the slack in the timing belt, but do not turn it further than the one-half tooth. The marks should line up and the slack should be gone.
Install the auto tensioner, but only screw the bolts in loosely. Apply 21 ft. lbs. of torque to the tensioner pulley, using the torque wrench. While holding the pressure on the pulley, move the auto tensioner up against the tensioner pulley bracket. Tighten the auto tensioner bolts to 23 ft. lbs. of torque. Check the timing marks once again, to ensure they are still aligned. Remove the Allen wrench from the tensioner body, allowing the tensioner to put tension on the belt.
Install the rest of the parts in reverse order of removal, then tighten the crankshaft pulley bolt to 105 ft. lbs. of torque.