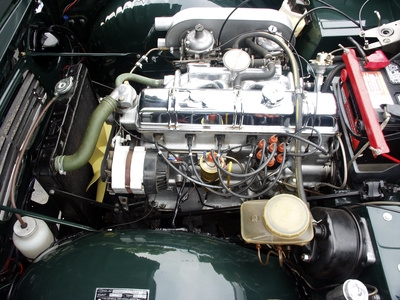
Replacing the timing chain on a Toyota Corolla is extremely difficult, so if you need it done, ask a professional. If you do decide to replace the chain yourself, consult with your mechanic and as many guides as you can. The chain works with the camshaft and crankshaft, and the positioning off all these parts is very important.
Disconnect the negative battery terminal. Make sure the parking brake is on and the gear shift is in "Park."
Remove the drive belt and alternator from the engine.
Raise the front end of the car and support it on jack stands. Remove the right front wheel and the right splash shield from the wheel well.
Drain the cooling system by removing the drain plug on the radiator and draining the coolant into a large container. As the coolant drains, unbolt and disconnect the power steering pump without disconnecting its lines. Tie it to the body with something strong like an untwisted coat hanger.
Raise a floor jack underneath the engine to support it, placing a wood block on the jack to prevent it from damaging the engine.
Position the number one piston at the top down center (TDC)--put the gear shift in neutral, attach a breaker bar and socket on the bolt in front, and turn the engine clockwise.
Remove the crankshaft pulley/vibration damper by removing the bolt from the front of the crankshaft and pulling off the pulley with a puller that can bolt to the pulley hub. Make sure you don't rotate the engine off the TDC position as you do this.
Remove the passenger-side engine mount, the drive-belt tensioner, the engine mount bracket, the crankshaft position sensor from the timing chain cover, the water pump and the bolt securing the crankshaft position sensor wiring harness.
Disconnect the timing chain tensioner from the rear side of the timing chain cover by removing its mounting nuts. Remove the cover's fasteners with a Torx wrench and pry the cover off the engine.
Slide the crankshaft position sensor reluctor ring off the crankshaft, remembering that the side with the "F" mark faces outward. Remove the chain's tensioner pivot arm/chain guide, which is on the left side of the chain, by removing the pivot bolt.
Lift the timing chain off the camshaft sprockets and remove it from the engine with the crankshaft sprocket as an assembly. Pry the socket off with multiple flat screwdrivers if it won't come off by hand.
Remove the stationary timing chain guide that guided the chain on the right side of the engine. Remove the camshaft sprockets by loosening their bolts while holding the camshaft lug with another wrench.
Install both camshaft sprockets to their original locations by aligning the sprockets' dowel pin holes with the camshaft dowel pins; these pins must be in the 12:00 position. Tighten the bolts to 40 foot-pounds while holding the lug with the wrench again.
Reinstall the stationary timing chain guide.
Loop the replacement timing chain onto the crankshaft sprocket, aligning the Number One colored link with the mark on the sprocket. Install the chain and sprocket on the engine. Slip the chain into the stationary guide's lip and around the exhaust camshaft sprocket, removing all slack from the chain's right side.
Remove the slack from the chain's left side while installing the timing chain tensioner pivot arm/chain guide, tightening the pivot bolt to 168 inch-pounds. Make sure the tab on the pivot arm doesn't move past the stopper on the cylinder head.
Install the crankshaft position sensor reluctor ring; the "F" mark must face outward.
Apply RTV sealant to the sealing surfaces on the timing chain cover and place the cover in position on the engine. Tighten the bolts evenly in multiple steps to 120 inch-pounds if they have 10 millimeter heads; if they have 12 millimeter heads, tighten them to 168 inch-pounds.
Reconnect the water pump with its O-ring and the engine mount bracket, applying a small amount of RTV sealant to the threads on the engine mount bracket bolts.
Reload and lock the timing chain tensioner by raising the ratchet pawl and pushing the plunger inward with your fingers until it bottoms out and then engaging the hook on the tensioner body with the pin on the plunger.
Install the tensioner into the timing chain cover with the hook facing up, lubricating the O-ring with a small bit of engine oil. Install the crankshaft pulley/vibration dampener.
Set the chain tension by rotating the engine clockwise slightly; look for the hook on the tensioner to to release itself from the pin and allow the plunger to spring out. If it doesn't do this, press the pivot arm downward and release the hook with a screwdriver.
Rotate the engine clockwise until the number one piston is back at the TDC position on the compression stroke.
Install all other parts in the reverse order of removal; this will include the power steering pump, right front wheel and splash shield, alternator, drive belt and battery cable. Refill the engine coolant.