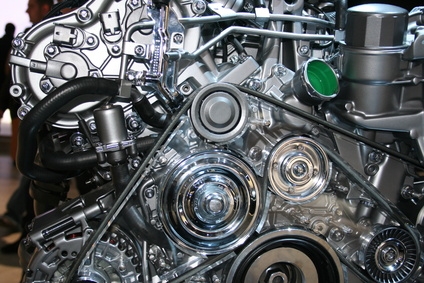
The timing belt on the Honda Civic turns the engine with the camshaft and crankshaft. If the timing belt needs replacing and you choose to do this yourself, consult with your mechanic before you begin. Changing a timing belt is a very difficult and precise operation that should be done by a professional if at all possible.
Disable the fuel system by disconnecting the glove box and removing the PGM-FI #2 relay from its mounting bracket then running the engine until it stalls. Disconnect the car's negative battery cable.
Raise the car's front end and support it on jack stands, then remove the left wheel and the splash shield underneath the engine.
Remove the drive belts by loosening the mounting bolt nut for each drive belt's main component, such as the alternator and power steering pump, with a wrench, turning the adjuster bolt to loosen the belt's tension then slipping the belt off the pulleys. The power steering belt will come off first.
Disconnect and remove the power steering pump by removing its adjuster bolt and mounting nuts/bolts with a wrench. Set the power steering pump aside without disconnecting its hoses.
Detach the alternator by disconnecting the output cable and electrical connector, removing the lock and adjusting bolts from the bracket between the alternator and compressor then removing the mounting bolts.
Remove the valve cover and its gasket by removing the ignition coils and the oil dipstick, then removing the valve cover bolts.
Raise a floor jack to support the engine, placing a block of wood on top of the jack to protect it.
Remove the spark plugs by pulling out their wires at the boot and unscrewing them with a wrench and spark plug socket.
Remove the upper left and side engine mounting brackets by removing their fasteners with a wrench.
Position the engine's number one piston at the top dead center (TDC) position.
Disconnect the camshaft position sensor by unplugging its electrical connector and removing its bolts.
Remove the upper timing belt cover by loosening its bolts with a wrench.
Loosen the crankshaft pulley bolt with a breaker bar and socket while holding the pulley in place with a strap wrench, then slip the pulley off the crankshaft.
Unbolt and remove the lower timing belt cover.
Detach the crankshaft position sensor by disconnecting its electrical connector and mounting bolt.
Loosen the tensioner bolt for the timing belt with a ratchet or breaker bar, push on the tensioner to release the belt tension, retighten the bolt then slip it off the belt.
Align the holes on the tensioner pulley and base, then insert a 3 mm drill bit or pin into the holes.
Install the timing belt, inserting it tightly around the crankshaft sprocket, tensioner pulley, water pump pulley and the camshaft sprocket. Loosen the tensioner's mounting bolt by a half turn so the tensioner will slightly increase tension on the belt.
Turn the crankshaft counterclockwise by two turns, then check and make sure the timing marks and camshaft sprocket index marks are properly aligned.
Tighten the tensioner's mounting bolt to 33 foot-pounds and remove the pin.
Reinstall all of the other parts in the reverse order of removal--this includes the crankshaft pulley, timing belt covers, crankshaft and camshaft position sensors, engine mount brackets, valve cover, spark plugs, alternator, power steering pump, drive belts and battery cable.
Adjust the drive belts, as needed, by turning the adjuster bolts.