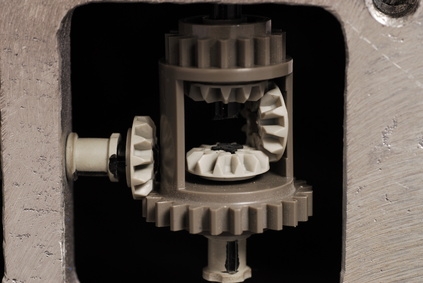
Four-wheel drive vehicles have a front differential that requires routine maintenance. This involves removing and replacing the oil inside of the main housing. This oil lubricates the moving gears and wears thin after 60,000 miles (or less with heavy off-roading). The average backyard mechanic can change the oil in a front differential in about 30 minutes.
Remove the differential drain bolt at the bottom of the differential casing, if applicable, by turning it counterclockwise. Have the drain pan underneath the differential for the one or two quarts of spent oil that will pour out. The drain plug hole takes a 3/8-inch socket driver head on most types, but this hole is a recent addition to four-wheel drive vehicles. Many newer independent front suspension (IFS) models will have a drain plug for the front differential, since the cover is difficult to access. Allow the unit to drain for 10 minutes or so, and wipe up any excess before replacing the drain plug in a clockwise direction.
Remove the differential cover, if there is no drain bolt on the bottom of the casing. Most differential covers use between eight and 16 bolts around their edge, and turning all of these bolts counterclockwise will loosen the cover. The oil will come rushing out after about the third bolt is loosened, as the gasket loses cohesion and the oil succumbs to gravity. Collect it in the pan. With all bolts removed, pull the cover free of the gasket and set it aside. (This may require the partial removal of some steering components in IFS suspensions.) Scrape the differential casing for gasket fragments using a screwdriver, and allow more oil to drain from the open differential. Scrape the gasket from the cover, and as the oil pools in the center of the casing check it for metallic debris. Metal glitter in the differential oil can indicate worn gears. Clean the cover with a lint-free cloth. Run a bead of RTV sealant (blue is the common color, which is a medium heat range) around the inside lip of the cover. Don't cover the holes, but make sure the bead is one continuous line. Press the gasket (in the proper alignment) to the RTV bead, then run another bead around the top of the gasket. The cover is now ready for re-installation.
Press the cover against the differential casing and finger-tighten two or three upper bolts clockwise to hold it in place. Finger-tighten the remaining bolts and then begin to socket-tighten them until the RTV sealant begins to ooze from the edges. Wipe up any excess sealant around the edge. Typically these bolts should be tight, but torqued to manufacturer's specifications. In the field, a good firm degree of torque is necessary, but not enough to squeeze all of the RTV out from the edges or warp the gasket. Allow the sealant to dry for about an hour.
Open the refill plug on the front cover of the differential, or on the side casing, by turning it counterclockwise. This plug can take a 3/8-inch driver square, but older models could have a 1/2-inch driver hole. With the vehicle on a level surface, inject the oil into the open hole until it begins to come back out. The proper fill level for most differentials is to the bottom of the fill hole. Wipe up any excess oil, then replace the drain plug clockwise into the hole.