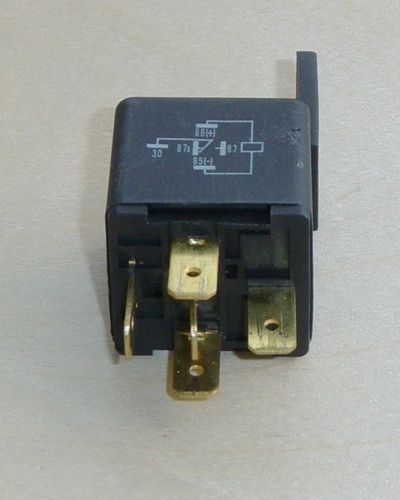
A car relay is a particular kind of remote-control switch. It is magnetically operated and is used to control electrical circuits from a distant point. It controls electrical components like fuel pumps, air conditioner motors and radiator fans. But relays use flexible mechanical contacts that wear or burn, effectively blocking current to the circuits they service. Fortunately, a car relay is easy to test. Troubleshoot any particular relay in your car and find out whether you actually need to replace it.
Find the particular relay you want to test. Depending on the circuit it controls, the relay may be located under the dashboard or inside the engine compartment in a junction block.
Turn the ignition switch to on to energize the particular circuit you are testing, if necessary.
Connect the alligator clip from a test light to any good ground on your vehicle. Probe the wire coming out of the relay and going to the component with the tip of the test light. If the bulb in the test light glows, there is voltage, and your relay is working properly.
Probe the wire or wires feeding voltage to the relay with the test light following the same procedure used on the previous step. If the light glows, there is incoming voltage. Otherwise, the relay is not receiving voltage. Check the voltage source.
Switch the ignition key off. Unplug the relay from its electrical connector, making sure not to break the locking tabs on the relay.
Identify the relay's power and control terminals. Some relays show a circuit diagram on top of the case to identify these terminals.
Check for continuity between the two power terminals using an ohmmeter. There should be no continuity. If there is continuity, replace the relay.
Connect a jumper wire between the battery positive terminal and one of the control circuit terminals on the relay. Connect the other control terminal to ground with another jumper wire. If you do not hear a click as you make the second connection, reverse the connections. If you still do not hear a click, replace the relay.
Connect the jumper wires as you did on the previous step. Using an ohmmeter, check for continuity between the two power terminals. If there is continuity, the relay is working properly. Otherwise, replace the relay.