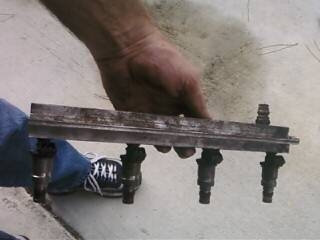
The fuel injector internal assembly on your Chevy Cavalier is prone to failure after years of service. The valve may stop opening and closing, or may partially open, allowing only a limited amount of fuel to reach the combustion chamber. If you serviced the Electronic Fuel Injection system and need to replace one or more injectors, it's not very difficult to install the new units.
Remove the fuel pump fuse or relay to relieve fuel system pressure.
Start the engine and let it idle until it stalls. Then crank the engine for about three seconds to relieve any remaining pressure.
Detach the ground battery cable using a wrench.
Disconnect the fuel line from the fuel rail located around the top of the engine. On fuel lines with a metal collar, use a quick disconnect tool of the appropriate size for your particular model. If your Cavalier model uses a plastic collar on the fuel line, squeeze the plastic tabs on the connector and pull the line off the fuel rail.
Wipe both the connector and fuel rail ends using a clean shop rag.
Unscrew the mounting bolts from the fuel rail to detach it from the engine using a ratchet, ratchet extension and socket. Then, carefully lift the rail and fuel injector assembly from the engine.
Unplug the electrical connector from the injector or injectors you need to replace.
Pull the retaining clip from the injector or injectors you need to replace using a pair of needle nose pliers, if necessary.
Pull the injector(s) carefully from the fuel rail, making sure to remove the O-ring from the top of the injector.
Install a new O-ring onto the top and bottom of the injector or injectors you are replacing. Then, carefully attach the injector to the fuel rail.
Insert the retaining clips on the injector(s).
Plug the electrical connector to the injector(s).
Set the fuel rail in place around the top of the engine, making sure the tip of each injector enters properly in their respective intake ports. Then screw the mounting bolts using a ratchet, ratchet extension and socket.
Apply a light coat of new engine oil to the connecting ends of the fuel rail assembly and the fuel line.
Push the fuel line quick-connect fitting into the fuel rail end until the fitting lock or tabs snap in place. Then, slightly pull on the fuel line to make sure it is properly connected.
Install the fuel pump fuse or relay.
Attach the ground battery cable using the wrench.