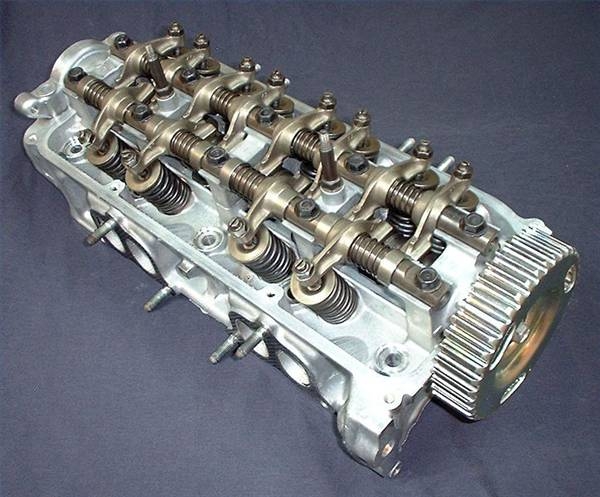
Removing the cylinder head is necessary if you need to rebuild or install a replacement. Every engine model differs in the specific steps required to remove the head. Besides, every manufacturer recommends taking the head-mounting bolts off in a specific order and sequence to avoid damage to the head. This guide will give you a general idea about the steps you will need to take; consult the vehicle service manual for your particular make and model to accomplish this task properly.
Drain the coolant by placing a catch pan underneath the radiator and opening the drain valve.
Separate those accessories around the cylinder head that might interfere with its removal such as throttle body, steering pump mounting bracket and air cleaner system. You will need a wrench and ratchet, ratchet extension and socket set; standard and Phillips screwdrivers.
Detach the intake manifold from the cylinder head using a wrench and ratchet, ratchet extension and socket.
Detach the exhaust manifold from the cylinder head using the wrench and ratchet, ratchet extension and socket.
Remove the valve cover or covers using the ratchet, ratchet extension and socket.
Remove the timing belt or chain using a wrench and ratchet, ratchet extension and socket.
Unfasten the rocker arm shaft, if your cylinder head is equipped with one; otherwise, go on to the next step. Start with the two mounting bolts located on the center. Turn the bolts two turns counterclockwise at a time, working your way out in an alternate pattern. Remove the bolts once the bolts are loose and keep them organized. Do the same on the other cylinder head if your vehicle model is equipped with two heads.
Unscrew the head-to-block mounting bolts. Use a breaker bar, ratchet extension and socket. Turn the bolts counterclockwise two turns at a time, starting at the center and working your way toward the ends in an alternate way.
Lift the cylinder head off the block. If necessary, wrap a shop rag around a pry bar and insert the bar into one of the intake or exhaust ports. Carefully, dislodge the head from the block making sure not to damage the cylinder head mating surface.
Remove the head gasket from the engine block.
Seal the new head gasket with aluminum paint, unless the manufacturer specifically recommends not to use any. Spray both sides evenly and let it dry. Then set the gasket on the engine block and make sure the gasket "Front" mark is at the front of the engine block.
Set the clean head on the engine block and make sure the head sits properly on the engine locating dowel pins. Then push the head firmly on the engine block.
Apply a coat of new engine oil to the threads of the head-to-block bolts and the underside of the bolt heads. Then install the bolts loosely. Finally, tighten the bolts in the sequence recommended by your vehicle manufacturer. Use a socket, ratchet extension and torque wrench (see Tips & Warnings).
Install the rocker arm shaft, if your vehicle model is equipped with one, and install the rest of the valve train components. Use the wrench, ratchet, ratchet extension and socket. Torque the mounting bolts to manufacturer specifications.
Install the timing belt or chain using the wrench and ratchet, ratchet extension and socket.
Install the valve cover or covers using the ratchet, ratchet extension and socket.
Attach the exhaust manifold and new gasket to the cylinder head . Torque the mounting bolts in the sequence recommended by your vehicle manufacturer. Use a torque wrench, ratchet extension and socket.
Attach the intake manifold and new gasket to the cylinder head. Follow the manufacturer recommendations for torque and tightening sequence.
Install the rest of the accessories to the engine head that you had to remove. Use the wrench, ratchet, ratchet extension and socket set; standard and Phillips screwdrivers.
Refill the coolant system with a new coolant mixture. Use 50 percent antifreeze and 50 percent water.