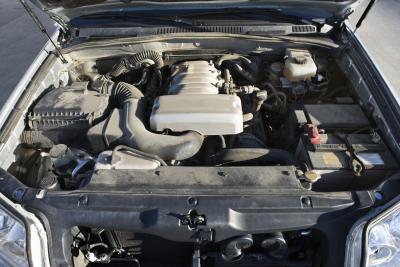
The LT1 is a second-generation V8 engine used in Chevrolet vehicles. Originally designed in the 1950s, the LT1 contains 350 cubic inches as well as a variety of contemporary engine design functions, including an overhead valve motor and a reverse-flow coolant system. Comparatively, the LS1 is a newer design commonly used in Corvettes and other Chevrolets since 1992. While the LS1 may offer additional speed and engine utility, making the shift from an LT1 to an LS1 engine requires significant investments of money and time. For best results, consult a certified mechanic before making the conversion to ensure you include all necessary components.
Turn off your vehicle and let it sit for at least an hour before removing parts. Open the trunk to locate the engine mount nuts on either side of your LT1 engine. Unbolt and remove these nuts using an appropriate size ratchet. Loosen all bolts attached to the engine mount – including the transmission bushing nut – allowing you to remove the transmission shifter and coolant temperature sensor.
Place two jacks or transmission lifts beneath your crank pulley and transmission. Crank both jacks until they apply light pressure beneath these two parts. Locate the transmission bracket on the outside of your transmission, removing the bolts attached to it.
Slowly lower the bracket at a 15-degree angle toward the back of the car, while lifting the jack attached to your crank pulley. Continue moving the two parts until the motor mounts ease out of the stock bolt holes. Once separated, carefully push the engine toward the passenger-side engine bay to create extra room for removing the LT1 engine.
Unbolt and remove the battery tray overflow jug and air box located near the engine. Attach the chain around the front frame horns of the engine using two industrial-strength carabineers. Slide a steel cart with wheels beneath your engine and lift the chain attached to your engine so it’s supported by the hook of your electronic hoist. The hoist should be positioned directly over your engine.
Pull on the chain to make sure it's safely attached to your LT1 engine’s front frame horns. Remove the four bolts out of the transmission cross-member, along with any other bolts connected to your engine. Lower the jack attached to your crank pulley and move it out from underneath your vehicle. Turn on the hoist and begin lowering the engine onto the steel tray. Turn off the hoist once slack starts to appear on the chain. Remove the chain and any remaining tubes or wires.
Slide the LT1 engine out from underneath the car. Wrap the chain around the LS1 engine using a carabineer. Attach the chain to the hoist and slowly lift your LS1 above the hood of the car. Maneuver the hoist to position it directly above where your LT1 engine used to be.
Slowly lower the hoist until the holes connect flush against the four bolts of your transmission cross-member, along with other compartments, including the battery tray overflow jug and air box. Insert all bolts and attach all engine components to your new LS1 engine. Once secure, remove the chain. Remove all debris, extra parts and other unnecessary materials from the motor before attempting to start the car.