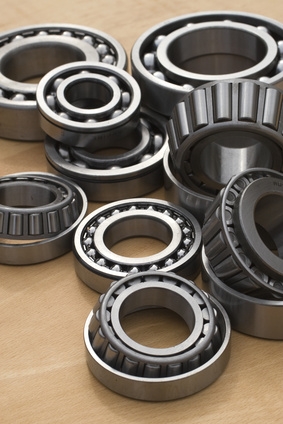
The wheel hub houses the wheel bearings, which allow the wheels to turn smoothly, due in part to the large amount of grease packed in with the bearings. The wheel bearings support the weight of the vehicle and its load while minimizing the effort needed by the vehicle to perform its duties. The wheel hub also keeps all the parts of the wheel securely assembled and keeps the wheel securely attached to the vehicle.
Loosen the lug nuts around the inner part of the hub cap using the appropriate socket but do not completely remove them. Use the jack to hoist up the vehicle and return to the lug nuts and remove them, setting them in a safe place. Remove the wheel and place out of the way. Using a screwdriver and hammer, tap at the dust cap to remove it and set it aside in a safe place.
Remove the two caliper bolts, taking care not to allow the brake caliper to dangle by the brake line. Untwist the wire clothes hanger and create a temporary loop to hold the brake caliper in place, attaching to the vehicle or something nearby that can support the brake caliper without pulling on the brake line.
Remove the retaining screw at the center of the wheel hub and then remove the center hub. With a screwdriver and hammer, carefully knock the notch at the edge of the axle nut and use the appropriate axle nut socket and breaker bar to remove the axle nut. This will require some force as it is attached with 200 ft.-lbs. torque. When the axle nut has been removed, grip the bearings with a rag (to protect fingers and buffer against the grease) and pull with even pressure to slide off. Remove the brake shield, if desired, and clean it.
Use the three-jaw puller to remove the inner bearing race. Knock the inner dust shield out. Take the old parts and set them aside to be properly disposed of. Get the new parts ready to be placed on the vehicle.
Replace the brake shield, once it has been cleaned if this was done, and place the inner dust shield properly in its spot, pushing it into place by hand and gently tapping with a tool, if needed, to ensure it is in properly. With gloved hands, apply a generous amount of automotive grease to the axle to protect against rust and damage.
Take the new hub bearing, check to ensure there is sufficient grease on it and adding more if needed, and carefully slide it into place. Use a bearing installer to secure it. Replace the axle nut, using the appropriate axle nut socket and breaker bar to apply 200 ft.-lbs. of torque. Using a screwdriver and hammer, notch or dent the outer portion of the axle nut. Install the dust cap but check the wheel hub by spinning it a few times to ensure there are no metal-on-metal sounds or other inappropriate noises coming from the motion of the spinning.
Replace the wheel and tighten the lugs to 85 ft.-lbs. of torque, using the appropriate socket size. Replace the hub cap, if any. Lower the vehicle from the jack and dispose of all old parts properly.