The timing belt is part of engine's drive system that connects the crankshaft to the camshaft and controls the timing of your engine's valves. When the car reaches high mileage, the timing belt on your Honda Accord can begin to wear down and eventually fail. Mechanics and car manufacturers recommend that you replace the timing belt every 90,000 to 100,000 miles for the 2002 V6 model engine. In addition, if you notice that your timing belt is frayed, damaged, missing hunks of rubber or is cracked or showing severe glazing, it should be replaced immediately to prevent costly damage.
Disconnect the cable from the negative battery terminal. Place the vehicle in park and apply the parking brake. Block the rear wheels.
Remove the drive belts. Use a wrench on the tensioner pulley center bolt and turn the tensioner counter-clockwise to release the drive belt tension. Remove the belt.
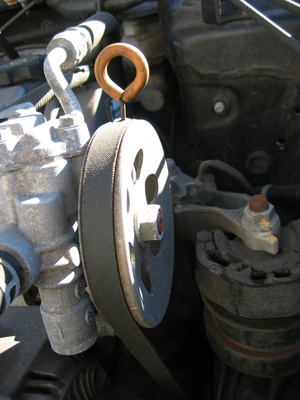
Remove the power steering pump by removing the pump mounting bolts. Move the pump away from the area. Do not disconnect the power steering lines from the pump; position the assembly off to the side.
Remove the spark plugs, to make it easier to turn the crankshaft, by placing the spark plug socket over each plug and removing it from the engine by turning the plug counterclockwise.
Position the number one piston at Top Dead Center (TDC), which is the highest point in the cylinder that each piston reaches as it travels up-and-down during crankshaft rotation. To do so, turn the cranskshaft with a socket and ratchet attached to the bolt threaded into the front of the crankshaft. Turn until the TDC notch on the crankshaft pulley is aligned with the pointer on the timing belt lower cover.
Loosen the lug nuts on the right-front wheel. Raise the front of the vehicle and support it securely on jack stands. Remove the right-front wheel. Remove the right-front inner fender splash guard by removing the fasteners securing the inner fender splash guard in place.
Support the engine by placing a floor jack under the oil pan, with a block of wood on the jack to protect the pan. Remove the splash shield from under the radiator by removing the 10 mounting fasteners from the front area of the hood.
Remove the two bolts and wiring harness retainer holding the passenger-side engine mount to the block. Remove the trough-bolt and remove the mount. Remove the engine mount bracket and the engine oil dipstick tube.
Remove the upper timing belt covers from the rear cylinder bank. Mark the belt with the direction of rotation onto the timing belt if you intend to reuse the belt. Make sure the timing marks are properly aligned by aligning the marks on the sprocket with the mark on the rear cover. Also verify the camshaft sprocket timing marks are aligned with the rear cylinder bank.
Use a strap wrench to hold the crankshaft. Loosen and remove the crankshaft pulley bolt. Remove the lower timing belt cover bolts and remove the cover. Slip the timing belt guide off the crankshaft sprocket, noting the installation. Also note the alignment of the crankshaft sprocket timing marks.
Recheck the position of the timing marks. Install the timing belt in a clockwise direction, starting at the crankshaft sprocket and tensioner pulley, then the rear camshaft sprocket, water pump, front camshaft sprocket and idler pulley.
Install the outer timing belt guide over the camshaft sprocket with the chamfered edge facing away from the belt. The chamfered edge is the edge that has been machined to an acute angle (less than 90 degrees). Tighten the idler pulley bolt to 33 ft-lbs. Remove the battery hold-down bolt that was holding the tensioner pulley in position.
Turn the crankshaft slowly six revolutions clockwise, using a socket and breaker bar on the crankshaft pulley bolt to seat the belt, then return to TDC. Recheck the alignment of the cam and crank timing marks.
Install the lower timing belt cover. Install the crankshaft pulley, aligning the crankshaft key with the pulley keyway (the hole cut to fit the crankshaft key). Install the bolt and tighten it to 104 in-lbs.
Recheck the timing marks. Reinstall the remaining parts in the reverse order of removal. Reconnect the battery.