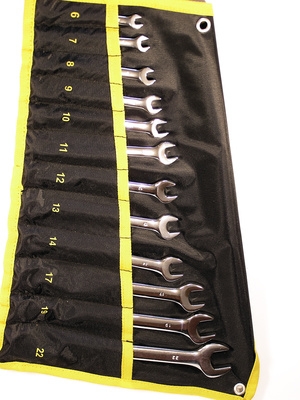
Automobile batteries can last between three to five years, depending on driving conditions and geographic regions. Opening the hood to the 2002 Chrysler PT Cruiser may intimidate the technically challenged would-be mechanic. Locating the battery may take a minute or so and when it's located, some may consider hiring a professional. However, changing the battery in your PT Cruiser is not as complicated as it looks.
Open the hood and locate the top of the air filter box on the driver's side (right side of the engine when facing it from the front).
Locate the band strap at the rear of the air box cover and loosen it with a slotted screwdriver. Note the rubber tab on the intake hose (wrapped by the band clamp) and the notch on the air box cover. The notch and tab need to be aligned during reassembly.
Unsnap the two front air box cover retaining clips and then pivot the cover off of the air box. Gently pry the air box housing out of the intake hose. Use the slotted screwdriver to carefully help you pry the hose off of the housing, if necessary, but be careful not to damage the hose. If necessary, loosen the band clamp more without removing it.
Set the air box cover aside. You will now see the battery in front of the air box. Remove the air filter from the air box and then wiggle and pull the air box straight up to remove it from the engine compartment. There will be some resistance. There are two plastic studs at the bottom of the air box, seated inside rubber grommets. Wiggle and pull until you have successfully removed the air box.
Locate the retaining bolt on the battery hold-down clamp at the bottom rear of the battery (toward the air box side). Use a ratchet, extension and suitable socket to remove the bolt in a counterclockwise motion.
Loosen the negative battery terminal clamp (on the right, near the fender) first with a hand wrench. Once loose enough, wiggle it and remove it from the battery. Use the screwdriver to help pry it off the battery post, if necessary.
Loosen the positive battery terminal clamp (on the left) last. Removing the negative clamp first prevents the risk of sparks emitting from the positive terminal when removing the clamp from the positive battery post.
Slighty tip the top of the battery carefully toward the rear of the engine and extract it from the engine compartment. Be careful, as it's very heavy; do not tip the battery on its side. Remove the insulated jacket from around the battery (if applicable).
Clean the battery terminal clamps with a battery terminal cleaner brush and a solution of baking soda and warm water. Clean the battery tray if necessary to remove any corrosive powder that may exist. This powder is white, green and sometimes yellowish in color. Wipe the battery tray dry with a shop rag.
Place the insulated jacket onto the new battery, if applicable, and then install the battery into the engine compartment, making sure the positive post is on the left (facing the engine compartment) and the negative is on the right. There will be "plus" and "minus" signs on the battery housing near each post.
Install the positive battery terminal clamp first and then the negative battery terminal clamp last.
Tighten the clamps with a hand wrench. Replace the bolt for the hold-down clamp and tighten.
Replace the air box. Make sure the nozzle hose on the side of the box is facing the driver's side fender and inserts into its respective fitting. Align the two plastic studs to the rubber grommets and push down. It will require as much wiggling as it did to remove it.
Replace the air filter into the air box and then replace the air box cover. Be sure to get the air intake hose onto the air box cover housing properly. Align the tab of the hose to the notch in the cover. Tighten the band clamp.