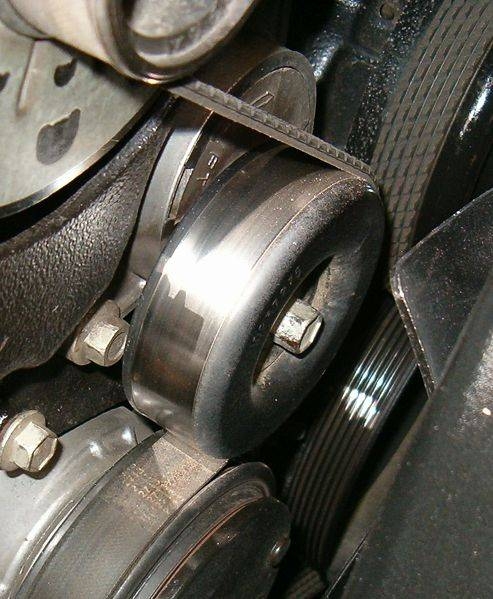
Most vehicles today run with a serpentine drive belt, also known as an S-belt. The belt is driven by the engine crankshaft and provides rotation to the alternator, power-steering pump, water pump, air-conditioner, and other components. One belt does it all. A belt tensioner or an automatic belt tensioner is used in an S-belt application. This tensioner is internally spring loaded and preset during manufacturing. The tensioner pivots just enough to allow removal of the S-belt. After time and normal wear and tear, either the pulley on the tensioner can wear out or the internal spring can fail. When that happens, the belt may squeal, prematurely wear, and possibly not provide enough tension to allow the car to run properly.
Open the hood of the vehicle and locate the serpentine belt routing diagram (if available). It is a sticker that is usually in a conspicuous place, on a bracket or brace near the belt, along the front engine frame rail, or under the hood. In the event a belt routing diagram is not available, refer to the repair manual for the vehicle.
Refer to the belt routing diagram (or manual) to locate the belt tensioner and pulley. Be aware that it is difficult to access the drive belt on some vehicles. Refer to a repair manual to see if removing a wheel and splash guard to access the belt tensioner may be required.
Obtain the tool required to relieve the tension on the belt tensioner. Different tensioners require different tools, and as mentioned, some cars only offer so much room to work with. Some tensioners may be released by turning the pulley bolt head clockwise (turning it counterclockwise would remove the pulley bolt and pulley), while others may have a square drive located on the base of the tensioner that a certain ratchet drive will fit (usually 3/8 inch or 1/2 inch drive, or 12 mm or 13 mm on some foreign makes). A belt removal tool comes with most adapters needed to remove a serpentine belt.
Use the tool to relieve the tension on the belt with one hand and then remove the belt from the easiest accessible pulley with the other hand. You do not have to remove the belt entirely unless you're replacing the belt. Be aware that some front-wheel drive vehicles may require the removal of an engine mount to replace a serpentine belt.
Locate the retaining bolt on the belt tensioner. This is not the tensioner pulley bolt, but a retaining bolt located on the base of the tensioner. It may be hidden beneath the pulley. Remove the tensioner retaining bolt using an appropriate tool (box-end wrench or socket wrench).
Remove the tensioner. Compare the tensioner to the replacement tensioner to make sure it's the same part. Note the back side of the tensioner that sits against the engine block. Some tensioners have a guide pin or an aligning dowel that sits into a pre-drilled hole on the block to help hold the tensioner in place. Be sure to align it properly when installing.
Install the new tensioner, aligning the guide pin, and replace the retaining bolt. Tighten the bolt thoroughly. Refer to the manual for specific torque specifications for the bolt if desired.
Relieve the tension on the new belt tensioner to allow the drive belt to be replaced onto the pulley system. Make sure you're routing it properly. There is usually very little margin for error when installing a serpentine belt. If it does not feel like it's fitting properly, then it is most likely misaligned along the pulley system somewhere. Check the ribs of the belt to ensure they are properly seated into the grooves of all of the pulleys. When the tension on the tensioner is relieved, you should have just enough room to replace the belt onto the easiest accessible pulley, as it was removed.
Clear all the tools out of the engine compartment and start the vehicle to make sure the belt is working properly and not squealing.