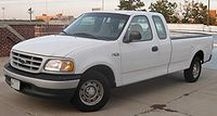
The fuel pump on your Ford F-150 is inside the fuel tank. This allows the pump to build the high pressure needed by the fuel injection system installed on the most recent F-150 gasoline engine models. However, fuel pressure may fail to build up after the pump internal components wear out. You may have difficulty starting the engine, the engine may suddenly stall or not start at all. If these scenarios apply to you, it is time to replace the pump.
Detach the splash shield from the frame rail located underneath the driver's side door. Use a ratchet and socket.
Unplug the electrical connector you will see after removing the splash shield. The connector leads to the fuel pump module.
Start the engine and let it idle until it stalls. Then crank the engine for about five seconds to relieve the remaining fuel pressure from the system. If the engine does not start due to a bad fuel pump, crank the engine to make sure fuel pressure is relieved.
Turn the ignition key to the "Off" position.
Disconnect the ground battery cable from the battery using a wrench.
Jack up the rear of your F-150 using a floor jack and support it on two jack stands.
Remove the tank shield if your particular model is equipped with it using a ratchet, ratchet extension and socket.
Support the fuel tank with the floor jack.
Disconnect the straps holding the tank to the truck's body using the ratchet, ratchet extension and socket.
Lower the fuel tank just enough to gain access to the fuel lines, vapor lines and fuel pump electrical connector on top of the tank.
Disconnect the fuel lines and vapor lines from the sending unit/pump module. Press the lock tabs on the lines' quick connectors and carefully pull the lines from their fittings. Unplug the pump-module electrical connector.
Release the sending unit/pump module by turning the lock ring counterclockwise using the fuel tank sending unit wrench 310-123 or equivalent (see Resources and Tips for more information).
Lift the sending unit/pump module off the tank carefully and discard the O-ring seal underneath the flange of the module.
Remove the old fuel pump from the module using a screwdriver and a pair of slip joint pliers and install the new pump on the module.
Lubricate the new O-ring seal with clean engine oil and lay the seal on the fuel tank opening.
Install the sending unit/pump module in the tank and turn the lock ring clockwise using the fuel tank sending unit wrench.
Lift the fuel tank just enough to attach the fuel lines and vapor line and plug the pump module electrical connector.
Raise the fuel tank to set it in its mounting place and secure the tank straps using the ratchet, ratchet extension and socket.
Install the fuel tank shield using the ratchet, ratchet extension and socket, if you had to remove it.
Lower your F-150.
Connect the ground, battery cable using the wrench.
Plug the electrical connector located on the frame rail underneath the driver's side door.
Attach the splash shield to the frame rail using the ratchet and socket.
Turn the ignition key to the "On" position for three seconds to let the fuel system build pressure. Then turn the key to the "Off" position. Repeat the cycle three times to make sure the system has enough pressure.
Start the engine and check for fuel leaks.