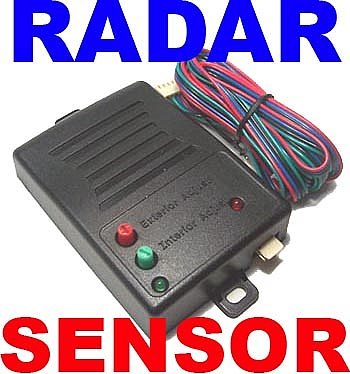
Most effective vehicle intrusion sensor. This dual zone radar proximity sensor detects moving high density objects using RF field Disturbance Technology. Ideal for convertibles or any application where zone intrusion protection is desired
This device is designed to sense motion or movement within the vehicle's interior as well as provide a Pre-Warning output for movement outside the vehicle. It uses a microwave frequency to detect field disturbance within a contained area; hence it's designed to be part of an automobile alarm system. It works like a double layer force field around your car.
Also, it has sensitivity adjustments for exterior and interior zones to allow for a Pre-warning. In other words, the range can be adjusted. For example, when an intruder comes within the exterior range, the green LED lights up for a few seconds triggering your alarm to sound its pre-warning signal. When the intruder comes within the interior range, the red LED lights up and trigger your alarm system! This is perfect for convertibles!
If your car alarm system does not have a Pre-Warning input, this device can be used as a single zone sensor. As a single zone sensor, this device will still detect movement or motion inside your vehicle. Also, if you have an automatic window roll-up kit with your power windows, the Pre-Warning * trigger can be used to roll up your windows in the event of a possible intrusion or break in.
The ultra high frequency wave will penetrate carpet, plastic, glass, wood, or fabric. It will not go through metals.
It's best to place it face up in the most center part of your car with no metal on top to cover it.
We recommend having a professional alarm shop install this item for you. You do risk damaging your car or alarm if you decide to install it yourself. But if you insist, here's how in layman's term.
1st. Some alarms have an extra sensor input. Most car alarms don't. If your car alarm has an extra sensor input wire, use it. If not, then you'll need to locate on the alarm. Locate the shock sensor on the car alarm. The shock sensor will have from 3 to 4 wires coming from the car alarm brain. Usually its black, red, blue, and, green.
Splice the red wire of the radar sensor to the red wire of the shock sensor.
(If you're using the extra sensor input wire, then connect the red wire of the radar sensor to 12 volt constant positive)
Splice the black wire of the radar sensor to the black wire of the shock sensor
(If you're using the extra sensor input wire, then connect the black wire of the radar sensor to a negative when armed wire of the car alarm. This negative when armed wire is usually colored orange. If your car alarm does not have this wire, then you can connect it to constant ground. By doing so, the radar sensor will always be on. There will be a very small battery drain but it shouldn't be too bad.)
Connect the blue wire from the radar sensor and connect it to the blue wire of the shock sensor. Be sure to use a diode between this connection to prevent feedback that will cause false alarms. Note* I have hooked the radar sensor up many times without a diode and it still worked fine with no false alarms.
If your shock sensor has a fourth wire, connect the green wire from the radar sensor to the last shock sensor wire. Be sure to use a diode between this connection to prevent feedback that will cause false alarms. ((If you're using the extra sensor input wire from the car alarm, then do not connect the green wire from the radar sensor. Just tape up the green wire as it will not be used. This means that you will be using the radar sensor as a single zone sensor.
Now fine tune the radar sensor by adjusting the sensitivity knob. Turn it clockwise for higher sensitivity and counter clockwise for less sensitivity.
First start by turning both knobs counter clockwise until it stops
Then starting with the green know (Interior Sensor) turn it slightly clockwise a ¼ turn and then test for desired range.
You'll need to test it each time you make an adjustment by arming the alarm, waiting about 1 minute and then slowly approaching the car
The reason for the one minute wait is because asianwolf car alarms has an intelligent circuit delay that will allow other components (such as window rollup modules) to finish their function before activating the sensors. This will prevent the alarm from detecting itself and giving a false alarm.
Now repeat the same thing for the red knob (skip this step if you only hooked up 3 wires for single zone)