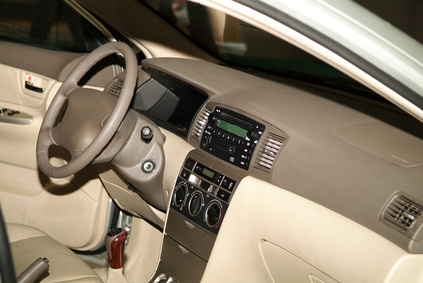
You can take advantage of installation services offered by many stereo retail outlets to install your new car stereo for a fee, or you can install the new deck yourself for a fraction of the cost. Purchase the necessary adapters and wiring harnesses for your vehicle as well as any tools specifically required to access the stereo-mounting dock of your car. Installation of your new stereo can be done in less than one hour.
Remove the grounding cable from your vehicle's battery before installing your new stereo. The grounding cable connects the negative battery terminal to the frame or chassis of your vehicle. Use an adjustable wrench or set of pliers to loosen the bolt that holds the cable's clamp to the negative battery post. Remove the cable from the post and set it away from the battery until the new stereo is completely installed.
Replace the cable's clamp around the negative battery post once the new stereo has been installed, and tighten the bolt with the wrench or pliers.
Obtain a repair manual for your specific vehicle. The manual will instruct you on how to access the stereo mounting dock in your vehicle. Some vehicles require stereo removal keys (or DIN removal tools) to extract the stock stereo from the stereo dock in the dashboard. Other vehicles will require that you remove the dash panels surrounding the stereo to access the stereo mounting bracket.
For vehicles that require the removal keys, insert the two prongs of each tool into the openings at either end of the factory stereo's face. Push the tools all the way into the openings until they lock into place. Pull outward on the keys while pulling the stereo from the dashboard. The unit will slide from the dock far enough for you to access the wiring connected to the outlets on the rear panel of the stereo.
For other vehicles, remove the panels as directed in the vehicle's repair manual, and remove the screws or bolts that secure the stereo into the stereo mounting bracket. Once the screws are removed, pull the stereo from the bracket and unplug the stereo wiring from the outlets on the back of the unit.
Unplug the antenna cable from the back panel of the radio. The antenna cable is a single black cable that is connected to the FM antenna cable outlet on the right side of the stock radio.
Choose between an aftermarket faceplate adapter or an installation sleeve (or collar) to make the vehicle's mounting dock compatible for the new stereo. The faceplate adapters can be purchased from a car audio outlet and be specifically designed for your vehicle make and model. An installation sleeve is often included with the new stereo.
Place the stereo installation sleeve into the vehicle's stereo mounting dock. Use a flat screwdriver to bend the metal tabs on the inside of the sleeve to secure it into the vehicle's mounting dock.
To use a faceplate adapter, insert the adapter into the vacant stereo mounting dock of the vehicle. Push the faceplate adapter into the opening until it snaps into place.
Use a wiring harness adapter to connect the new stereo to your vehicle's stereo wiring. Plug the vehicle stereo wiring connectors into the corresponding plastic connectors of the wiring harness adapter. Plug the wiring harness adapter connectors into the outlets on the back panel of the new stereo.
For stereos that require direct wiring connection, splice the wiring from the stereo and the wiring harness. Place the individual wires of similar color together. Place a plastic end connector over the two exposed wires and crimp the connector with a wire crimper.
Plug the vehicle's antenna cable into the outlet on the back of the new stereo labeled "FM ANT" or "antenna."
Feed the stereo wiring and wiring harness adapter into the stereo mounting dock. Slide the new stereo into the faceplate adapter or installation sleeve until it locks into place. The edge of the new stereo will be level with the trim of the faceplate adapter when it is fully seated into the dock.
Replace any paneling that was removed to access the stereo. Consult your vehicle repair manual for exact procedures.