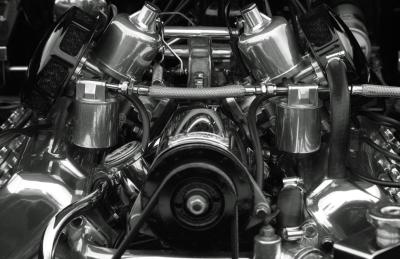
Water can increase the power and fuel efficiency of gas motors. Some systems inject water into the exhaust headers to cool the exhaust side of the heads; a small amount of water can be atomized and injected directly into the carburetor. It may sound counter-intuitive, but just like building a campfire, some moisture can be present if there's an appropriate ratio of air and combustible fuel. When moisture is present in an engine, the engine runs cooler and makes more power. High humidity, for example, usually creates more power. You can inject an atomized mist directly into your carburetor, of up to 5 percent of the amount of fuel injected. A simple system can inject a 5 percent water-to-fuel ratio, according to Mother Earth News.
Drill a 3/8-inch hole through the top of your air filter. Remove any sharp edges with a round needle file, and install a rubber a grommet into the hole. The inside diameter of the grommet should be one-fourth of an inch or slightly smaller.
Mount a vinyl fluid reservoir on the firewall or inside fender walls of the engine bay. You can use an old windshield wiper fluid reservoir. Locate it as high in the engine bay as possible without creating an obstruction. Drill two or more pilot holes in the engine bay's sheet metal, aligned with the reservoirs mounting flanges, and mount it with self-tapping sheet metal screws.
Drill a 1-inch hole in the top of the reservoir wall, just under the fill cap. Insert a 2-inch section of PVC pipe, 1-inch in diameter, slightly through the hole. Hold it in place, temporarily, with tape. Cement it in place with PVC cement. To reinforce the joint, mix two-part polyester resin and apply it to the inside and outside seam of the round joint with a small disposable applicator.
Cut a section of 1-inch diameter, clear plastic tubing long enough to reach from the reservoir's PVC inlet to the valance under the front bumper of the car. It has to be plumbed along the edges of the engine so it's not in the way of moving parts or extra hot parts.
Slide one end of the clear tube over the PVC inlet. If it's not a really snug fit, use a 1-inch metal hose clamp to tighten it in place.
Plumb the clear tubing along the engine bay, mounting it with vinyl cable ties, and point the open end directly into the oncoming airflow at the front of the car. This air flow will pressurize the system.
Cut a length of one-quarter-inch copper tubing long enough to fit from the reservoir to the carburetor. Leave a little extra room for bending and adjustments. Use a brass plumbing coupler to connect the one end of the copper tube to the reservoirs gravity-fed outlet.
Slide the other end of the copper tubing through the grommet in the top of the air filter.
Drill a hole in the end of a 1/4-inch brass plumbing cap. Tap the hole using a tap and die with threads that match standard carburetor jet threads. Insert the brass cap into the end of the copper tube. Solder or braze the cap in place.
Thread the smallest available carburetor jet into the end of the threaded brass cap.
Adjust the the brass tube so the jet is an inch or so directly above the carburetors venturi when the air filter is in place. If it is a multi-barrel carburetor, raise the tube, centering it over all barrels.
Experiment with carburetor jet sizes. With the reservoir full of water and a small enough jet, the system will not dispense any water at idle, which is OK, but ideally it will dispense a small amount. As the car moves, the air inlet will pressure the system, forcing more water to be atomized.