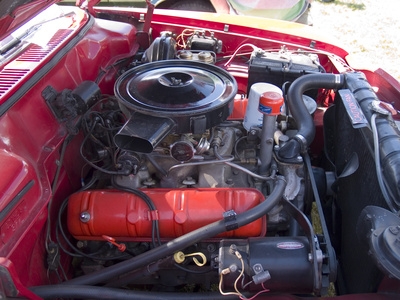
Introduced in 1955, the first 265 cubic inch small block was a revelation in terms of performance and design. While not particularly impressive by today's standards, the first small block's 162 horsepower was quite impressive for the time. The small block's versatile nature quickly made it a darling among aftermarket manufacturers, which drove Chevrolet to produce even more powerful and sophisticated variants. Indeed, some of the best upgrades come in the form of factory-engineered Throttle Body Injection (TBI) packages from GM itself.
Remove the factory carbureted intake manifold and install the TBI manifold. The factory GM TBI manifold is a direct bolt-on replacement for almost any cylinder head, but you might consider installing an aftermarket aluminum manifold for some additional power. The throttle body is essentially a replacement carburetor, so it bolts in place exactly as the carb came off.
Replace your stock fuel pump with an a vane-type, 12 psi TBI fuel pump. You don't need to use an in-tank fuel pump as some TBI-equipped vehicles did; a standard in-line electric fuel pump will suffice. Just remember to install a pre-filter before the pump to keep grit and rust out of the pump mechanism.
Route your new fuel lines from the fuel pump, along the chassis' frame-rails and into the fuel input on the throttle body. GM sells rubber-lined fuel-line clamps to mount the lines to the chassis, but you should be able to salvage the clips from your donor vehicle. They simply install into the frame-rails with self-tapping sheet-metal screws. Install a 1987 Chevrolet C10 fuel-level sending unit in your fuel tank in place of the stock sending unit; it already contains the fuel-return fitting and is calibrated to work with TBI.
Remove your stock, non-electronic distributor and replace it with the electronic distributor from your donor vehicle or any other non-Vortec, fuel-injected small block. You could convert your original distributor, but a good factory distributor with the appropriate four-pin connector and internals shouldn't run you more than $100 from a wrecking yard or $250 brand new.
Install the computer inside on the inside of your vehicle's firewall with self-tapping sheet-metal screws. Drill a hole in the firewall for your wiring.
Install the vehicle speed sensor (VSS), which screws in-line between your speedometer cable and transmission. The VSS is essentially an interceptor sensor that counts the speedometer cable revolutions to tell the computer how fast the vehicle is traveling. You may need to use a second speedometer cable from the VSS to the transmission and a custom fabricated bracket if your transmission crossmember lacks the clearance require to screw the VSS directly to the transmission case.
Remove the passenger-side engine block drain plug and screw the knock sensor in its place. Install the oxygen (O2) sensor in your exhaust pipe just past the exhaust manifold. This will typically involve drilling a hole in the pipe, welding a bung (large nut) to the pipe over the hole and screwing the O2 sensor into place. Plug the MAP sensor into the intake manifold.
Install the aftermarket wiring harness as per your harness kit instructions. This can actually be the easiest part of the entire install if you use an aftermarket harness and fuse block designed for exactly this purpose. These kits come with detailed directions and the right connectors to make this system a true plug-and-play.