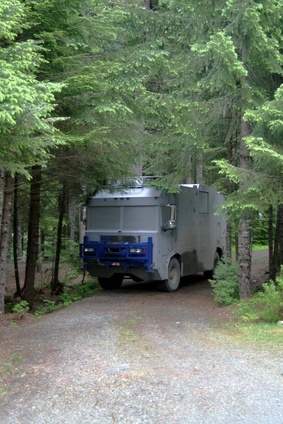
As of 2010, the most expensive motor home on the planet (the Featherlite Vantare Platinum Plus) costs $2.5 million, and even an average, new Class A motor home can run you well over $300K. A really nice, used school bus or inter-city motor coach, on the other hand, can run you less than 10 percent of the cost of a new motor home. Even with the cost of conversion, you're looking at an approximately $60K buy-in. Given those kinds of numbers, it's small wonder that do-it-yourself conversions are as popular as they are among those willing to put in the work.
Remove the interior of your bus, including the seats, storage compartments, lighting and everything in the under-floor storage compartments. Remove the carpeting/flooring and all interior trim components to leave the bus a hollowed-out shell. The only mechanical components you should leave in place are those related to the heating/AC system.
Install adhesive-backed laminate flooring and plastic bathroom paneling on the walls. Use high-strength construction adhesive to attach the paneling to the walls. If your bus has curved walls, you can create a straight subframe for the paneling along the walls with an L-channel angle steel. If you wish to paint the walls, spray them first with a plastic-etching primer.
Build a wall five feet from the back of the bus to separate the bathroom from the rest of the motor home. Build it just as you would for a house, using 2by4s and plywood to build the wall, and connect it to the floor of the bus with through-bolts and nuts. Use high-strength construction adhesive to connect this wall to the walls and ceiling of your bus, and give it some extra support by running a pair of through-bolts through the roof. Place the bathroom door right next to the driver-side wall.
Install a bathtub, sink and chemical toilet in the bathroom. Build a bed with the head adjacent to the bathroom wall. Build cabinets, a dinner table, sinks, stove top and refrigerator housing, and install any other furniture, appliances and entertainment systems you like. Install the light fixtures, and route the wiring for all interior electrical components to a fuse block in one of the under-floor storage compartments.
Install your generator, batteries, fresh water tank, gray water tank and supplementary electrical system in the under-floor storage compartments. Punch louvers into the storage compartment where you've chosen to house the generator to ensure adequate cooling. Wire your generator and batteries to your interior accessory fuse block.
Inject multi-part insulating foam between the interior wall panels and exterior walls and the lower ceiling and roof.