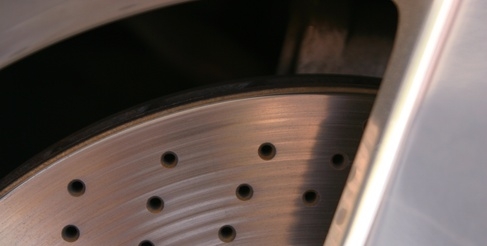
Disc brakes have a number of advantages over old-school drum brakes: performance (stopping power), durability, better fade resistance and quicker cooling. Disc brakes have proven their superiority to such an extent that even the most hard-core restoration enthusiasts are coming around to the idea of dumping their stock front drums in favor of disc brakes. Provided that you have the right parts, this wise retrofit may prove no more difficult than a standard drum replacement.
Raise one end of your car with a floor jack so that the tires clear the ground and secure it on jack stands. Remove the wheels with a tire tool.
Remove the original drum by tapping around the rear perimeter of the drum ridge with a hammer. An assistant may prove helpful here; have him pull the drum out while you are tapping it loose.
Disconnect the hydraulic brake line from the brake cylinder and remove the bolts that hold the brake backing plate to the axle or steering knuckle. These bolts may be on the front of the brake face on a solid axle but are usually located behind it. On a steering knuckle, the bolts are almost always on the back.
Pack the inner wheel bearing with grease and slide it into the back (flat part) of the rotor. Slide the new rotor over the axle studs. Kits with rotors will come correctly drilled for your application, but some junkyard swaps may require an axle replacement as well.
Pack the outer wheel bearing and slide it over the spindle and into the rotor. Lightly tap it into place with a hammer. Thread the retaining nut over the spindle and torque it to the amount specified for your car. Install the cotter pin retainer, if so equipped, through the hole in the spindle and bend the protruding tips back onto the bolt.
Install the caliper mounting bracket included with the kit in place of the drum backing plate. Kit brackets are designed as a direct replacement, so it should bolt in place of the backing plate. If you're doing a junkyard swap (as in retrofitting disc brakes onto a Ford 8.8-inch rear end), then you may need to install a second adapter plate between the axle flange and caliper mounting bracket.
Coat the caliper bolt threads with the anti-seize compound included in the kit. Install the brake pads into the caliper and slide the caliper over the rotor so its bolt holes line up with the mounting bracket's. Slide the bolts into the holes and tighten to spec.
Reinstall the brake line, double-check all of your torque specs and bolts then bleed the brake system. To bleed the brakes, have an assistant sit inside the car and quickly pump the brakes three times, holding the brake pedal to the floor on the third time. Unscrew the bleed valve on the caliper to allow air to escape while your assistant continues to hold down the pedal. Close the valve and repeat the pump-hold-bleed procedure until a solid stream of brake fluid comes out when you open the valve.
Repeat this procedure on every wheel you want to retrofit, bleeding the brakes after each wheel and again when you're done with all of them.