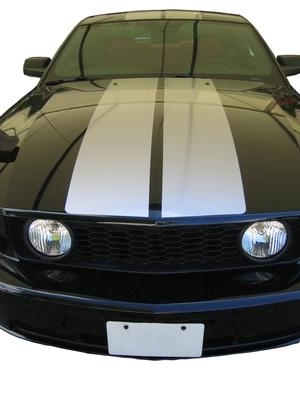
While many Mustangs come factory equipped with fog lights, other models--such as a few V6 models--do not. However, assembly takes place on the same factory lines. To maintain consistency and keep the auto assembly line running efficiently, many model years contain the same wiring harness. For Mustangs sold without factory fog lights, blanks take the place of the lamps and console switch for their operation.
Purchase a fog light kit that includes the lighting relay and control switch. Each of these components are available separately, but sometime harder to locate.
Disconnect the negative battery lead from the car’s battery. Move it away from the battery post to prevent accidental contact. For good measure, also remove the positive lead once the negative lead is out of the way. Reposition the positive battery terminal in the same manner.
Take out the center console of the car. Using a ratchet and extension, back out the bolts located within the console compartment. Once this is complete, slide the console slightly forward and up to clear the emergency brake handle.
Look for a gray electrical connector underneath the console. This connector plugs into the fog light switch that comes with the lighting kit.
Remove the coin holder in the console of the V6 Mustang. If the car is a coupe, remove the coin holder closest to the console compartment. Gently insert a flat-head screwdriver under the holder and pry it upward. Do not use so much force as to scratch or scar the console.
Press the fog light switch into the console. The clips on the sides of the switch will secure it in place once the switch is flush with the top of the console.
Plug the gray connector into the bottom of the fog light switch. The connector will only fit one way. Position the connector to match the pattern on the switch and press it in place. Make sure the keeper on the connector mates with the bottom of the switch.
Re-install the console and insert the console bolts with the ratchet and socket. Tighten the bolts. Recheck the fog light switch by pressing it on and off to ensure the switch is tightly in position.
Locate the fog light plugs just behind the delete panels on the front bumper. Remove the tie-wraps or zip-ties holding the plugs. Allow the plugs to hang down until they are ready to be installed on the light fixture.
Remove the fog light delete panels--or blanks--with a flat-head screwdriver or utility knife. Slide one of the fog light assemblies into position and secure it with the bolts provided with the kit. The fog light bolt holes are pre-drilled from the factory, and will line up readily with the fog light bracket holes.
Install the left and right fog light assembly with the three screws on each fixture. With the light fixtures securely in place, connect the fog light plug into the wiring harness plugs previously located behind the bumper. The connections securely made, tie the wires out of the way with tie-wraps.
Insert the fog lamp relay into the appropriate socket in the relay panel. The location of the socket may be slightly different depending on exact make of car. Refer to the diagram on the cover of the fuse panel to identify the correct relay socket for installation.
Re-connect the positive--then the negative--battery terminals to the battery posts. Start the car and test the new fog lights for proper operation.