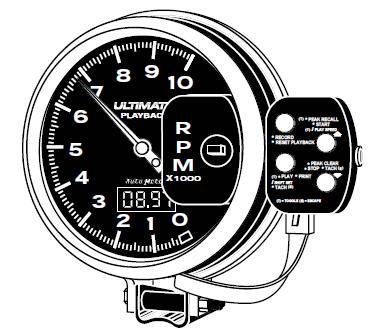
Every engine spins within the limits of its design. The pistons inside the engine pump the crankshaft to spin. This spinning crankshaft sends horsepower to the street. A tachometer counts the number of rotations the crankshaft is making a minute (RPM). It can also be used to shift gears at the right time during acceleration and braking. If the RPM of an engine is allowed to go outside of specific limitations, moving parts begin to generate enough heat and friction to become damaged. Use a tachometer to know when to shift and when to stop pushing a motor for more.
Find an open, level surface to park the vehicle where there is plenty of light. Keep your tools and safety gear close at hand during the installation of an electronic tachometer. A work light is recommended when working in dark areas under the dashboard and in the engine compartment. Locate all wiring junctions and prepare the tachometer for installation by arranging the wiring to make it easier to run the wires to their connecting junctions inside the passenger compartment and in the engine bay.
Run the tachometer wiring around or through the dash board down to the firewall behind the gas pedal. Use tie wraps to secure the tachometer wires to the body of the car. Separate the wires that will be connected inside the passenger cabin and those that will run into the engine compartment through the firewall. Install the tachometer into its mounting bracket in the place it will be secured to on the dashboard. With the tachometer and wiring in place, finishing the job is easy.
Use an existing hole in the firewall to pass the black and green wires through to the engine bay. Existing holes will have a rubber grommet to protect the wiring. Cut out a notch in this grommet to pass the wires through or drill a new hole for the wires to be sent. Once finished, this hole can be made weather proof with a silicon gasket gel that has dried around the hole and wires.
Connect the tachometer's black wire to the battery ground of the vehicle. Continue to use tie wraps to secure the tachometer's wires to the outside of the engine compartment and up to the battery junction box. A secure ground connection will help the tachometer to run correctly. Connect the green wire to the negative post of an existing electronic coil or Electronic ignition system using a tachometer adapter as a connector.
Connect the white wire to the inside lighting switch, which will illuminate the tachometer when the headlights are on. The red wire is for the ignition switch. Connect this red wire so that when the car is started the tachometer will begin operating. T-splice wire adapters allow for new wires to be spliced together with existing ones using pressure connectors that you squeeze around the existing wire to make the connection.