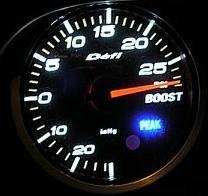
Turbo equipped cars and trucks use a combination of forced air into the engine's intake manifold plus fuel to create horsepower that is transferred to the road via the drive train. Factory turbo charged vehicles come with a gauge that measures this boost, but inefficiently. The job of the aftermarket boost gauge is to measure the amount of inducted air that is being created by the system inside the intake manifold, which indicates the amount of power that is being created as well as heat that can build up within these turbo charged engine packages. Aftermarket boost gauges are an important part of increased performance for turbo charged vehicles because factory gauges are connected to a vehicle's computer rather than the actual boost pressure being built inside the intake manifold. A boost gauge is easy to install and takes only an hour to complete.
Secure the dashboard mounting panel in a position that can be viewed easily when operating the vehicle. The placement of the new boost gauge assembly is flexible. Ranging from an A-pillar pod mount to a steering column adapter, the under dash mounting bracket is secured using two self tapping screws driven into the bottom edge of the dash panel near the center console. An easy placement, the dash mounted boost gauge will give the driver a quick view of the boost gauge when needed and is out of the way of view or hands.
Remove the top screw cap that will be the front molding when the boost gauge is installed into the mounting panel. The top of the gauge screws off and then the gauge is placed behind the mounting panel, and inserted into the panel so the front screw cap can be secured onto the gauge. Tighten the screw cap onto the gauge tightly and the gauge will stay in one place during use. If the gauge uses screws or nuts and bolts to secure the mount, do this now to ensure the gauge is protected from damage.
Direct the boost gauge sending unit through the firewall of the vehicle into the engine compartment using existing wire harness passages to complete this task. Cut a notch out of a rubber grommet that protects existing wiring or cables to pass the sender unit hose through to the engine compartment for connecting to the boost system. Secure the hosing using plastic tie downs that can secure the new hose to existing wire and hose pathways.
Connect to the existing boost system of the turbo charged engine package via existing vacuum hosing that can be found connecting to the intake manifold of the engine. Execute this method by splicing into the tubing with a "T" adapter and the same sized hosing and N/P adapters with the same diameter as the tubing or hose. Another method would be to drill and tap directly into the exhaust manifold to get the most precise readings. The latter method is expert rated. The vacuum hose boost gauge activation is 100 times better than a factory gauge or a turbo engine without a gauge, so keep it simple for the best results overall.
Wire the boost gauge using the radio as a path to the power and grounds needed to operate an electronic or digital boost gauge. Mechanical boost gauges can be operated by the compressed air alone, but gauges at night will need to be lit in some way to be useful. Check for the connections to power, ignition, illumination, and ground to wire a boost gauge for proper operation.