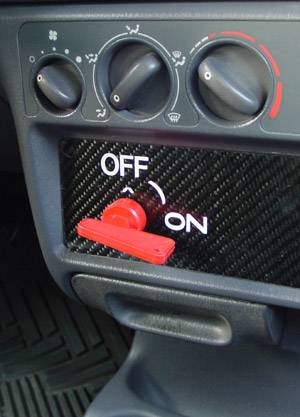
A kill switch is an effective and economical way to dissuade a thief from taking your car. While it may not prevent a professional thief from stealing it, it will likely deter the average amateur. The key to how to install a kill switch is the choice of what type of switch and where to place it. A kill switch that controls the power to you fuel pump is far more effective then a regular battery kill switch, because it is unexpected and can be well hidden.
Park your car on a level spot with the parking brake on. Raise the hood and disconnect the battery cable.
Use your wiring diagram to locate the power wire for your fuel pump. Make sure this is the power wire and not the ground by following the wire to the fusebox (or ignition). The ground will terminate to a connection to the frame of the car. Place a 'tag' on the power wire under the dash with a piece of electrical tape so you can find it again easily.
Open the package to your toggle switch and remove the mounting bracket and hardware. Follow the directions to mount the switch under your car's dash, or on the body of the driver's seat. You will need to use a drill if you do not have pre-drilled holes for the mounting screws. Make sure the switch is tightly installed by pressing firmly into the screws with your Philips Head screwdriver and turning it clockwise until it is hand tight.
Cut the power wire to your fuel pump with the middle section of your electrical crimping pliers.
Cut two pieces of #14 wire long enough to run from the back of the kill switch to the cut power wire.
Strip the ends of the cut power wire and both ends of each piece of #14 wire. Use butt connectors to connect a #14 wire to each of the ends of the power wire. Crimp the butt connector closed over the joined wires ,and pull lightly to make sure the connection is solid.
Attach the wire connectors to the bare ends of the two pieces of #14 wire (style will depend on the connectors of your toggle switch), crimp into place and tug test again.
Connect the #14 wire that joins the power wire that goes into fusebox or ignition box to the connection on the toggle switch that is above the base of the toggle (there will be only two connectors on the back of the switch; do not use the 3 post kind, as that is a lighted switch and easily found).
Connect the remaining #14 wire to the switch. Re-connect the negative cable to the battery and test your switch, make sure you can hear the pump come on, and you are done.