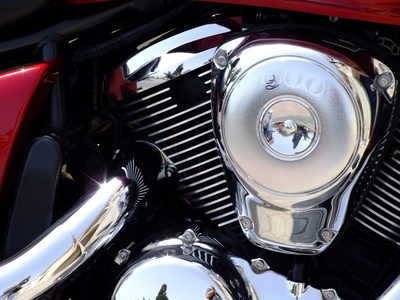
You may have heard the saying, "A Clean Car Runs Better." Well, that is not totally a myth. When you have a clean engine with all the sludge and grease removed, your car will run a little cooler. Engine painting is a fun project and will really give you a sense of accomplishment, especially when you compare before and after pictures. Not to mention that it will also make your car more desirable if you have any intentions of selling it.
Disconnect the positive battery terminal from the battery for safety reasons. With safety glasses on, degrease the engine thoroughly. Cover the electrical wires and distributor area first with plastic. You will be using a water hose and will want these areas to be kept as dry as possible. You need all grease and oils to be removed or the paint will not stick properly. Scrub and clean the very best you can and hose the area down thoroughly. If you plan to paint the fender wells and firewalls within the engine bay, degrease those areas as well.
Remove certain parts from the car before painting them, such as the alternator and power steering pump. You may decide to paint the valve covers, air filter housing and other parts such as the alternator, power steering pump, radiator shroud, radiator frame, chassis framework and maybe the battery tray. Remember that you will have to put them back again. In any event, you need to gain as much unobstructed access as possible to the engine block.
Tie off or wire loom any loose wires. Lay old rags or towels over the surrounding areas of the engine block. Use masking tape to tape off any edges of the block as well. Wire loom over loose wires (but not spark plug wires); this looks nice and protects the wires from heat and moisture.
Sand down and brush clean any rough spots or chipping paint from the engine block that the degreasing did not remove. This will leave you with as smooth surface. Wipe the engine clean with paint thinner or lacquer thinner to ensure an oil-free surface.
Spray two coats of the 1200-degree high-heat paint onto the engine block, covering as much territory as possible. Follow up with a paint brush for the areas you missed or couldn't reach with the spray can. Spray some paint directly into the cap from the paint can for a nice holder for the paint while brushing it on. This paint is thick, so to apply a third coat, you will have to wait until the first coats are completely dry and are no longer tacky. Spray the paint all the way down the side of the block as far as you can and plan on laying on your back some to get below as needed. Paint the front of the block as well, which is best accomplished with a 1/2-inch brush, since it may be awkward to spray the area. The detail of the paint job is important to get a professional look.
Degrease and sand clean any other engine parts you plan on painting, such as the valve covers or the alternator and then wipe clean with lacquer or paint thinner. Always end your sanding with a lighter grade of 320 grit. Hang these parts from an overhead garage beam or similar support with wire or rope and apply two to three coats of the 500-degree paint. Let dry completely before reinstalling.
Paint the firewall and inner wheel wells to really get a finished look. Tape off the area and use towels or rags to protect sections you do not want to paint. Clean and sand down the walls with 220 grit and finish up with 320. Wipe off the dust, then do a final wipe with lacquer or paint thinner, and spray two to three coats of the bumper coating paint on the walls. This paint will hold up exceptionally well, but it is not meant to be used on the block or parts that will get very hot. It resists scratches and if you need to respray or touch up an area later, it will not leave paint lines. It also has a nice matte finish, which also serves to hide flaws in the metal or, in some cases, the plastic walls.
Install any parts removed, doublecheck the wiring, reconnect the positive battery cable to the battery, remove any tools or rags from the engine bay and dust off your new paint job. You should be the proud owner of a very clean and painted engine.