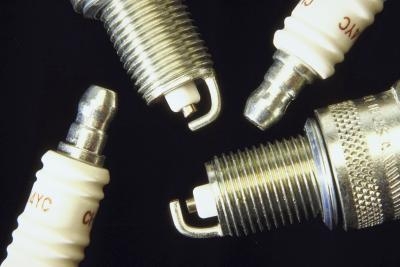
The spark plugs in the 2002 Chevrolet Blazer LS's 4.3-liter Vortec V-6 engine provide the electrical spark that ignites the compressed fuel/air mixture inside each cylinder, driving the pistons down, which in turn rotates the crankshaft and ultimately transfers rotational energy to the tires. The plugs are subjected to thousands of small explosions a minute; under these extreme operating circumstances, small changes in the fuel/air mixture can cause the plugs to foul with carbon deposits. General Motors recommends replacing the Blazer's spark plugs every 100,000 miles.
Locate the spark plug wires -- there are six of them, starting from the top of the distributor, between the rear of the engine intake section and firewall, with 90-degree elbows; there's a seventh, short wire, on top of the distributor, providing the electrical current to the distributor. The seventh wire is markedly shorter than the six ones leading to the spark plugs.
Follow each spark plug wire to locate the spark plug locations. Do not remove the wires from the plugs yet.
Wrap each spark plug with a small masking tape flag and write the plug number on the flag. The plugs on the driver's side of the engine should be numbered as follows: "1" in the front, "3" in the middle and "5" in the rear. The passenger's side plugs should be numbered as follows: "2" in the front, "4" in the center and "6" in the rear.
Remove the plug wires from the spark plugs and position them out of the way -- pull on the wire boot, not on the wire itself.
Clean the areas around each spark plug with compressed air or shop rags. After the plugs are removed, openings will be visible in the cylinder heads -- keep away any debris from entering into the heads, as it is not good for engine operation.
Fold the soft flap inside the passenger's side fender well back to access spark plugs 2, 4 and 6. Remove spark plugs 2 and 4, using a ratchet wrench, 6-inch extension and 5/8-inch spark plug socket. For spark plug 3, attach the 6-inch extension to the ratchet, universal joint to the extension, then the spark plug socket to the universal.
Jack the forward driver's side wheel and place it on a jack stand. This extends the suspension and lowers the driver's side wheel and tire for greater access to the more difficult to reach plugs on the driver's side -- there is a jack point just behind the forward driver's side wheel well; be sure to set the emergency brake before jacking.
Fold the soft flap inside the driver's side fender well back. Locate the steering shaft -- it is the long bar with the orange covering directly in view from the fender well opening. The driver's side plugs will also be accessed through the wheel well.
Slide the orange covering upwards toward the firewall. Additionally, rotate the steering wheel until the flat part of the bar is facing upward. These two procedures allow more access to the number 3 spark plug.
Remove spark plugs 1 and 5, using the ratchet, extension, universal joint and 5/8-inch spark plug socket. Remove spark plug 3, using the ratchet with an extension attached to it, a universal on the extension, a 3-inch extension on the universal and the spark plug socket on the extension.
Set the gap on the new spark plugs to 0.060-inch, using a spark plug gapping tool. Apply a tiny amount of anti-seize compound to the plug threads.
Install new plugs into the number 1, 3 and 5 locations by reversing the removal procedure. Once installed, tighten the plugs just past finger-tight. Torque the spark plugs to 11 foot-pounds with the torque wrench.
Lower the Blazer to the ground.
Install the new plugs into the number 2, 4 and 6 locations by reversing the removal procedure. Use the same tightening technique as for the driver's side plugs.
Reattach the spark plug wires. Pay special attention to ensuring that the wires are attached to the proper plugs. Remove the masking tape flags from the wires.