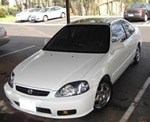
This article will guide you step by step in changing the brake pads and rotors on a 6th generation Honda Civic.
Lift up the car and place it on jack stands. Remove the wheels.

Locate the brake line that extends from the brake caliper. It is attached to the wheel bearing housing by two 10mm bolts; remove to free up the line for more room to move around later.
Remove two 17mm bolts holding the brake caliper bracket.

Wiggle the brake caliper out and either hang it by a bungee cord or place it on a box as there should not be any tension placed on the brake lines.

There is 2 Phillips screw holding the rotor, which are not necessary but comes factory built. They wont come out easily. Spray some penetrating oil, wait a few minutes. You will need a impact screwdriver, which turns as you hammer at the tip, breaking the screw loose while turning. If you do it without this tool, you may end up dulling the screw at which point you will need a drill to get it out.

Remove the old rotor and insert new one. Reinstall the caliper with caliper bracket. There should be 2 bolts holding the caliper on to the caliper bracket; you only need to remove the bottom bolt to access the brake pads for removal.

Remove old brake pads and install the new brake pads. Apply anti-squeal paste to the surface between the caliper and brake pads.
The caliper piston needs to be pushed back as the new pads are thicker and the pistons are likely pushed out from the old worn out pads. Open the brake fluid reservoir to allow pressure to be relieved. Use either a C-clamp or brake piston compression tool to push the caliper piston back.

Installed everything in reverse. Pump the brakes a few times before driving off.