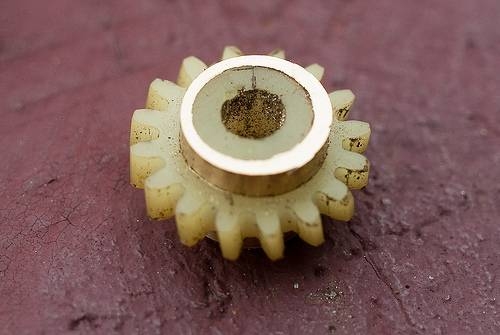
When your odometer ceases to work, most people assume they must replace the unit, which can get quite expensive. However, you can repair an odometer fairly easily. The odometer stops working because the gear within the odometer has worn out. You'll need no special tools to do this, but you must know what to watch out for or you could permanently damage the speedometer that is housed in the same gauge as the odometer. Don't worry about messing with the car's recorded mileage when you repair an odometer; you will not and cannot change the mileage it has recorded. Also note: the speedometer and odometer are part of the same gauge collectively referred to as the "speedometer gauge."
Disconnect the negative cable from your car's battery.
Using a flat head screwdriver, gently pry the gasket around the edge of the face of your speedometer gauge away from the dash and remove the gasket. Pull the entire speedometer gauge out of the dash; be careful not to disconnect the connecting electrical wires when doing this. Once you can reach behind the gauge, note how the wire connects to it and then disconnect it by grasping it near the connection and pulling it free.
Lay the gauge face down on your work surface and remove the screws from the back of the case with a regular-size Phillips head screwdriver. Once the screws are removed, lift the gauge out of its casing and turn it face up on your work surface.
Grasp the post that is used to reset the trip odometer and gently pull it from the gauge. Do this slowly; if you feel any resistance as you are pulling, place a finger under the dial of the gauge and press upward where the post passes through and connects into the motor casing. The motor casing will look like a small black plastic box attached to the reverse side of the dial, and will be separate from the metal housing of the gauge that contains the speedometer.
Remove the speedometer needle by pinching the round base of the needle and turning the needle clockwise until it stops, then pull up slowly and gently while rocking the needle back and forth slightly. It is very easy to bend the needle and it is essential that you take your time doing this step and do not force the needle off.
Unscrew and remove the two screws in the face of the gauge using one of the mini Phillips head screwdrivers from your computer repair kit. Once the screws are removed, pull the motor casing for the odometer out from the dial.
Pull the gear pod off the top of the motor casing. The gear pod is attached to the "lid" of the casing and will come off as such.
Pry the odometer planetary gear from the gear pod using a mini flat head screwdriver from your computer repair kit. Press your replacement gear into position and reassemble the gauge by reversing the steps you took to remove it.