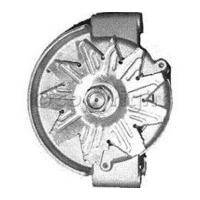
You may not even realize that your alternator has gone, as the battery holds enough of a charge to keep you going for several starts. Once the battery is drained, you won't be able to do any at all. On most cars, changing an alternator is a simple matter. However, the design of the engine compartment makes the steps involved to change an alternator on a Ford Contour a complicated and challenging job.
Park the car on a level surface. Turn the engine off. Open the hood and disconnect the negative terminal from the battery cable.
Loosen the lug nuts on the driver's side tire. Jack the car up till the tire has left the ground, and you can get a jack stand underneath to support the For Contour's weight. Lower the car onto the jack stand and remove the jack. Remove the tire.
With a socket wrench, remove the four bolts in the wheel well that hold the mud flap and the flap that protects the radiator from road debris.
Loosen the belt tensioner bolt by reaching in from the top of the engine with a socket or box wrench. This bolt is usually found in the engine block, holding a spacer bar to the alternator; consult your manual for the location in your specific year of Ford Contour, as they vary. Remove the belt from the pulley.
Pull the cotter pin from the ball joint stud where it connects to the wheel knuckle in the wheel well. Using a box wrench, loosen, but do not remove the nut on the stud.
Attach the Tie Rod End Puller to the tie rod by placing the tie rod end in the channel on the top of the steel grip of the puller, and twist the screw clockwise until the tie rod comes free. Separate the tie rod from the wheel knuckle.
Remove the nut on the ball joint stud that you loosened in Step 5.
Draw, mark or photograph the way that the wires connect to the alternator and then disconnect the wires.
Loosen and remove the three bolts holding the alternator in place. There will be one at the top, one at the bottom and one in the rear holding the alternator in a bracket attached to the car frame. Withdraw the alternator through the wheel well.
Installation is the reverse of removal. Remember to use a new cotter pin at the nut on the ball joint stud.