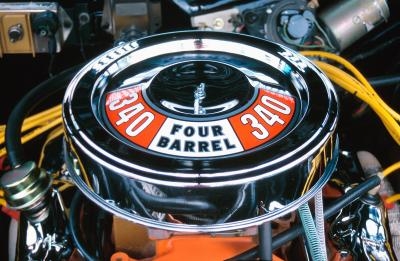
Motorcraft manufactures 2-barrel and 4-barrel carburetors for Ford cars and trucks. The carburetors are produced in numerous models including newer, more complex versions designed to meet emission standards. All Motorcraft carburetors have model numbers stamped on the body for reference when selecting a rebuild kit. Kits include jets, gaskets and check valves that are installed once the carburetor body and hard covers have been cleaned. Some kits come with a schematic that is followed by a number for the correct take-down and reassembly procedure when you rebuild a Motorcraft carburetor.
Place the Motorcraft carburetor on a piece of cardboard or a shop towel. Have a small plastic tub or glass jar nearby to hold screws, washers, clips and springs that you remove during the take-down.
Remove the solenoid assembly above the throttle linkage arm and the vacuum diaphragm assembly at the top of the carburetor using a screwdriver or nut driver to loosen the screws on each. Place the diaphragm cover in the cleaner basket.
Turn the carburetor around. Remove the choke lever clip at the upper side of the unit using needle nose pliers. Remove the choke rod that connects to the base of the choke assembly using the pliers. Remove the choke ring screws, choke and choke assembly screws. Place the choke assembly in the cleaner basket.
Loosen and remove four screws on the face of the accelerator pump cover. Pull the diaphragm, pump return spring and inlet check valve off the carburetor. Place the pump cover in the cleaner basket.
Remove the top of the carburetor from the body and place the top in the basket. Discard the top gasket. Using a screwdriver, remove the venturi assembly, float, needle seats and main jets from the inside of the unit. Place the venturi assembly and float in the cleaner basket. Discard the needle seats and main jets.
Fill a 1-gallon bucket halfway with carburetor cleaner. Immerse the basket and parts into the cleaner solution.
Spray the open ports in the carburetor body with spray cleaner. Wear safety glasses and clear the open ports with compressed air. Inspect the ports for lacquer deposits and clean the ports again if necessary.
Wear latex gloves. Lift the basket out of the cleaner solution and place the parts on the cardboard or towel. Put the carburetor body in the basket and immerse it in the cleaning solution.
Wipe the cleaned parts with shop rags. Avoid using paper towels that leave bits of fiber in recesses. Place the cleaned parts on a clean shop towel.
Remove the basket from the cleaner. Wipe the outside and inside of the carburetor body with shop rags. Inspect the body thoroughly and remove any residual deposits using spray cleaner and a shop rag.
Place the carburetor on the worktable. Install the new main jets and needle seats into the body using a screwdriver. Place the clean float in position inside the body. Install the clean venturi assembly using the saved screws and a screwdriver.
Put the new top gasket on the unit. Attach the top of the carburetor using the saved screws and a screwdriver or nut driver.
Install the new accelerator pump components in the order removed, beginning with the check valve, followed by the diaphragm and return spring. Attach the clean accelerator pump cover using the saved screws.
Attach the clean choke assembly using the saved screws. Install the choke and secure the choke ring using the saved screws. Reattach the choke rod and secure it using the saved choke lever clip and needle nose pliers.
Install the new vacuum diaphragm components into the top of the carburetor, beginning with the return spring, followed by the diaphragm and cover. Secure the cover using the saved screw.
Attach the new solenoid assembly to the carburetor body using the saved screw. Spray the throttle linkage and all external arms and rods with a generous amount of lubricant.