The front-engine Volkswagen Eurovan has plenty of room for passengers or supplies. It was also available in different camper versions. The oil filter is located above a shield under the engine. Replacing the oil filter will require changing out the engine oil. Always change both the oil and the filter to prevent contamination on either the oil of the filter. You should change the oil every 3,000 miles to keep the engine lubricated.
Park the van on a flat and level surface. Set the parking brake to prevent the van from rolling back. Chock the back wheel for extra safety.
Place a jack under the front crossmember and raise the van high enough to place jack stands under the "pinch points" under the front doors. These points are designed to hold the weight of the vehicle without causing damage to a jack or jack stands.
Unbolt the soundshield under the van by removing the four bolts holding the shield in place with a socket wrench. These bolts are located at the four corners of the shield. Unbolt the two nuts by the front crossmember as well. Pull the shield down and out of the way to gain access to the oil filter and oil pan.
Slide the drain pan under the engine and unbolt the drain plug with a socket wrench. Allow the oil to drain out while replacing the oil filter.
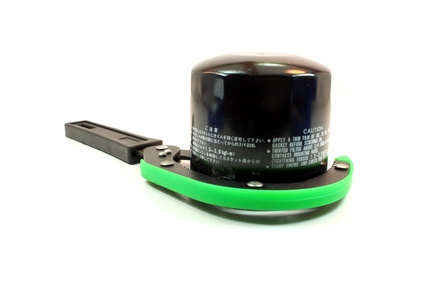
Locate the filter at the front of the engine. Unscrew it with an oil filter wrench. Place the old filter in the drain pan with the waste oil.
Fill the new filter up with engine oil. Dab some oil around the gasket at the top of the filter by applying some on a finger and wiping it on the gasket. This will help to ensure the filter seals correctly and removes easily at the next oil change interval.
Screw the new filter up to the housing by hand. Do not wrench-tighten, as this will strip the threads of the filter.
Tighten the drain plug with a socket wrench. Do not over-tighten, as this could strip the threads in the oil pan.
Bolt the shield back up under the van. Ensure the four bolts and two nuts are tightened with a socket wrench.
Raise the van with a jack. Remove the jack stands and lower the van to the ground.
Open the hood to get access to the oil cap. The cap is located in the front of the engine. Remove the cap and pour 5 qts. of oil down the tube.
Pull the engine oil dipstick located next to the oil fill tube. Wipe the dipstick clean and re-insert back into the dipstick tube. Pull it back out and verify the oil level. Pour oil in 1/2 qt. intervals until the dipstick reads full.
Start the van and allow it to idle for five minutes. Shut the van down and allow it to sit for five additional minutes. Check the oil level once more to ensure the dipstick reads full.