Transmission fluid is an essential element in the operation of any transmission system. In your Nissan Quest, the transmission fluid should be changed approximately every 50,000 miles to prevent the complications that can incur from using old fluid. When the transmission fluid gets dirty, it becomes thick. This thickness means that the components of your transmission will be rubbing against one another with great friction, eventually causing breakage that will create replacement costs. However, by changing your transmission fluid as part of a regular maintenance routine, your transmission should run smoothly and efficiently.
Run your Nissan Quest for at least 10 minutes before changing the transmission fluid. Warm fluid flows through the transmission system better, making it easier to drain for this procedure.
Turn your car off once the fluid has been warmed due to driving.
Raise your car using a car jack supported by four jack stands. The car should be at least six inches off of the ground and the jack stands should be placed evenly beside each tire under the vehicle.
Place your drip pan below the transmission pan, which is a square pan under the car below the hood area, closer to the driver's side.
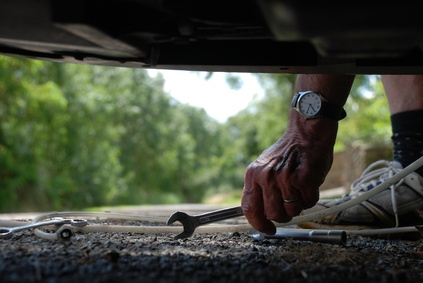
Begin unbolting the screws in one corner using your adjustable wrench. As each corner is loosened, allow any fluid to fall into the drip pan on the ground beneath your work area.
When all of the bolts are loosened, carefully lower the transmission pan and dump the remaining fluid and particles into your drip pan.
Wipe your Quest's transmission pan using a clean shop rag.
Mount the transmission pan back into place by refastening the bolts using your adjustable wrench.
Take the jack stands out from under your Quest, then lower the car jack until your vehicle is back on the ground.
Open the hood of your Quest and find the check valve for the transmission fluid. There will be a dipstick as an attachment to the check valve cap. This can be removed in order to pour fluid into the transmission.
Place the funnel into the check valve opening.
Pour the new automatic transmission fluid into the transmission through the funnel, one quart at a time. There is no need to measure the fluid yet, since you will see when the fluid appears to be reaching capacity.
Turn your car's ignition key once you believe the transmission fluid has reached the fill line.
Lock the emergency brake into place.
Shift the car into various gears for approximately 30 seconds for each gear. This step pushes the transmission fluid through your transmission system.
Leave your transmission in neutral and return to the transmission check valve under the hood of your car.
Place the dipstick into the check valve; the level is likely to have gone down some from when you originally poured the fluid in.
Replace the funnel and continue pouring the other quarts of fluid, measuring the level with the dipstick every half-quart or so. When the dipstick is wet up to the fill line, your transmission fluid change is finished.
Turn your car off and release your emergency brake.
Replace the check valve cap and close the hood of your car to complete the task.