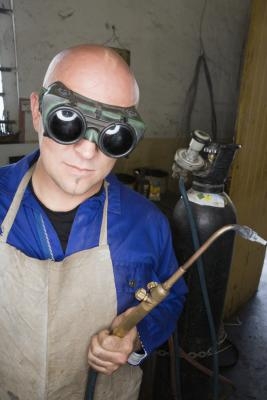
Oxygen acetylene welding requires following safe procedures. It can be dangerous unless you observe the proper precautions. The area must be free of inflammables, the equipment must be free of leaks, the area must have plenty of fresh air and the operator must be protected from hot metal.
Verify that the main pressure gauge for each tank is reading zero. If it is not, turn the valve on the top of each tank clockwise until it is closed. Once the valves are closed, open the valves (or taps) on the handle to purge any gas in the lines. The line pressure gauges should drop to zero. Gently close the taps on the handle by turning them clockwise.
Install the correct torch tip. Welding tips are numbered based on the size of the hole. The smallest hole is No. 1, which produces the smallest flame and the least heat. Screw the tip onto the end of the handle. Hold the handle so you can adjust the oxygen and acetylene taps with the other hand. Adjust the tip so that it points away from you before tightening it fully.
Start the gas flow. Slowly open the valve on the top of the green oxygen tank one-quarter to one-half turn. Do not open more than one full turn. The tank pressure gauge will indicate the pressure remaining in the tank. Repeat for the red acetylene tank.
Regulate the gas pressure in the lines. The knob on the regulator will adjust the pressure in the lines. The oxygen pressure should be twice the acetylene pressure. For heating the oxygen pressure should be 10 pounds per square inch, or psi, and the acetylene pressure should be 5 psi. Turning the regulator knob clockwise increases the pressure; turning it counterclockwise decreases the pressure in the hoses. Welding may require higher pressures than heating, but acetylene line pressure should never be set above 15 psi.
Open only the acetylene tap on the handle slightly. The tap next to the red hose adjusts the acetylene, and the tap next to the green hose adjusts the oxygen. Carefully, strike a spark with the striker, igniting the acetylene. Increase the flame size by further opening the acetylene tap on the handle until it stops smoking and is about 8 inches long. Slowly open the oxygen until a small blue cone appears in the middle of the flame and the center flame loses its "feathered edge."
Check your safety list. The area should be free of flammable items. Lower your goggles or face mask to protect your eyes. A bucket of water should be handy for quenching hot metal and putting out wood fires. Wear long leather gloves to protect against sparks and molten metal.
Use the tip of the inner flame to heat the metal. Do not get the metal too close to the torch tip or it can plug the tip or cause it to "pop." Keep the flame moving in gentle circles and do not let your tip get too hot. Always weld at least 5 feet away from the cylinders, and be cautious with your hoses.
Weld metal by melting the two pieces of metal together. The metal of each piece must be raised to the melting point and then allowed to flow together. The flow can be facilitated by the pressure of the gases and the circular motion of the flame. Gaps can be filled by melting welding rod.
Shut down in the opposite order from starting. Close the oxygen tap on the handle first to prevent the tip from "popping." Then close the acetylene tap on the handle. If a pop is created it can blow soot back into the tip, plugging the tip.
Close the tank valves by turning them counterclockwise. Open the taps on the handle once more to bleed any pressure from them. This should be done one at a time, opening and closing both the oxygen and acetylene taps.
Relieve the pressure on the regulator by turning its valve counterclockwise until you can feel the pressure release on the inside spring and the handle turns freely.