 Verne Simons
Senior Editor, Jp
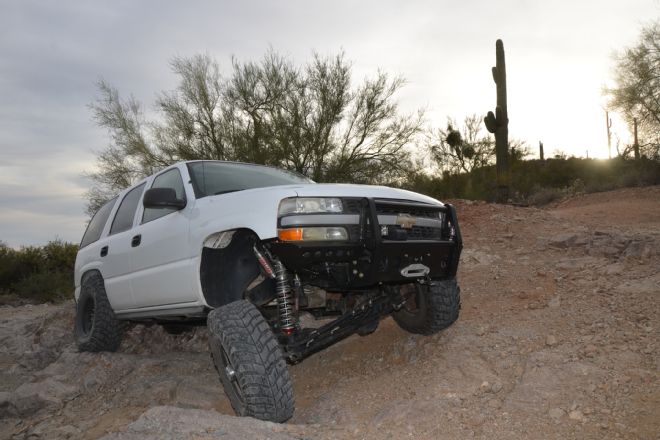
The idea was simple. With an expanding family at home, our comfy and capable two-door JK wasn’t going to cut it anymore. We like to be different, so rather than going out and buying and building a $20,000-$50,000 four-door JK like everyone else, we looked for another option—searching for a more affordable JK fighter, if you will. Our plan was to take a 2WD 2005 Chevy Tahoe formerly of the Henderson, Nevada, police force and create a unique, safe, reliable, and capable family wheeling machine. Sure, like four-door JK owners we would have to contemplate suspension upgrades and 1-ton axles, but at least our cop car already had a healthy V-8 between the framerails.
With a little help from our friends and the support of several aftermarket suppliers, we were able to convert the carlike Tahoe into a big bad 1-ton–axled 4x4 on 37s that drives well, rides great, and does all we need off-road. We added an AAM 9 1/4 front axle from a 2012 Ram 2500 with a Yukon axle Spin Free kit, an AAM front electric locker, and 4.56 gears also from Yukon. Out back we swapped in a junkyard-fresh, full-float 10 1/2-inch GM 14-bolt rear axle then filled it with Yukon-sourced 4.56 gears and a Yukon Grizzly locker.
The stock Chevy front independent suspension was hacked off and replaced with a four-link front suspension with custom-length control arms from Rusty’s Off-Road, ram assist steering thanks to Redneck Ram, 2 1/2-inch Sway-A-Way remote reservoir shocks, and dual-rate Eibach front springs. Skyjacker Suspension 3 1/2-inch rear coil springs and a two more Sway-A-Way 2 1/2-inch remote reservoir shocks suspend the rear of the Tahoe using factory four-link geometry.
Thanks to State To State Transmissions of Phoenix, our Tahoe’s rebuilt 4L60E transmission was modified with a 4WD main shaft and a factory T-case adapter. Bolted to this was an NP241C transfer case that was rebuilt and modified with a slip-yoke eliminator from Tom Wood’s Custom Drive Shafts and one of the company’s made-to-order rear driveshafts.
National Tire & Wheel sent us Mickey Thompson 37-inch Baja Claws mounted on Mickey Thompson wheels as well as a pair of eight-lug wheel spacers for the narrower-than-expected rear axle. We also designed and built a custom front winch bumper and heavy-duty rock sliders to protect the truck’s rockers.
Add in a few more accessories from the likes of Hi-Lift Jack and Lifetime LED, a heavy-duty pitman arm from Sam’s Off Road, and more, and our Tahoe is ready for family adventure time. Sure, in hindsight we would have done some things differently, but at the end of the day we have exactly what we want at the fraction of the cost of a new JK.
The best part is we did almost all of the work ourselves in our driveway at home. That means that just about everything we did for this buildup should be something you can duplicate at home with your next project. We owe lots of thanks to our friend and personal fabricator Rob Bonney, who helped steer us down the path to success and helped us avoid too many mistakes. For now, be sure that this project, while completed, is not done (no project ever is). There are still various things we’d like to change. You’ll get to see more of the truck in future articles, but for now we are calling this thing done.
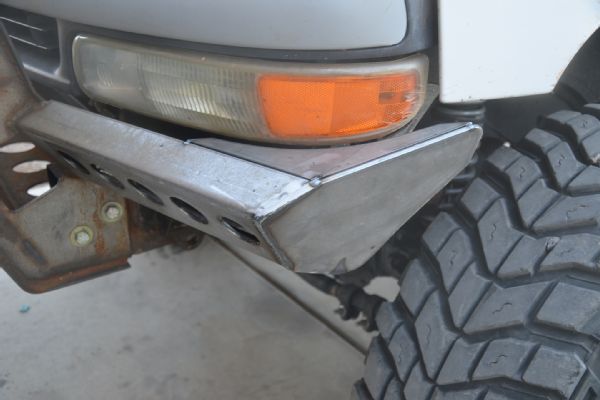
In Part 7 we started and almost finished our custom pushbar-inspired front winch bumper. We still needed to add details to finish the bumper up. Using cardboard, we made a template for these bumper endcaps.
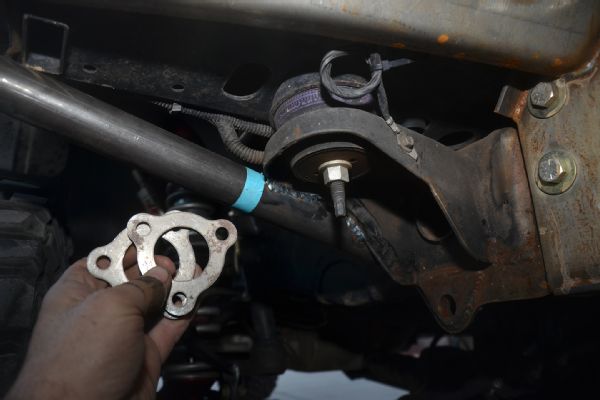
To add strength to the bumper’s wings, we also added a runner that goes from the frame to the endcap. This runner is welded to the frame and body mount. We’ll then cut it and add these tube flanges so the bumper can be removed, painted, and installed. These tubular runners triangulate the wings of the bumper and add a ton of strength.
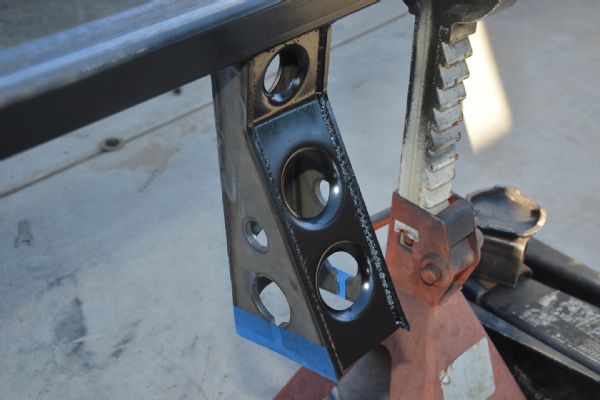
Also with the rocker guards tacked together we removed them for full welding. After the welds cooled we painted the tops of the rocker guards. These areas of the rocker guards will be very difficult to paint once the parts are installed. The tape keeps overspray off areas we will be welding to the Tahoe’s frame.
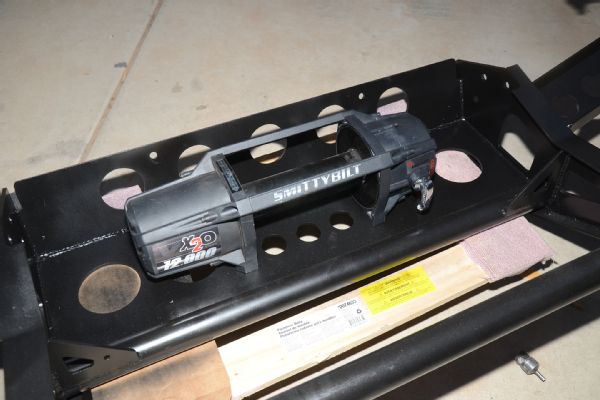
With the bumper almost done we removed it and added paint. This also gave us a chance to install the Smittybilt X20 Comp 12,000-pound winch. The winch features synthetic rope and is IP68 rated. That means it’s waterproof. The winch also comes with a wireless remote control (that can be used with a wire if you want) and an aluminum fairlead. The best news is our winch, like All Gen2 X20 Winches, comes backed by a lifetime mechanical warranty and a five-year warranty on electronics.
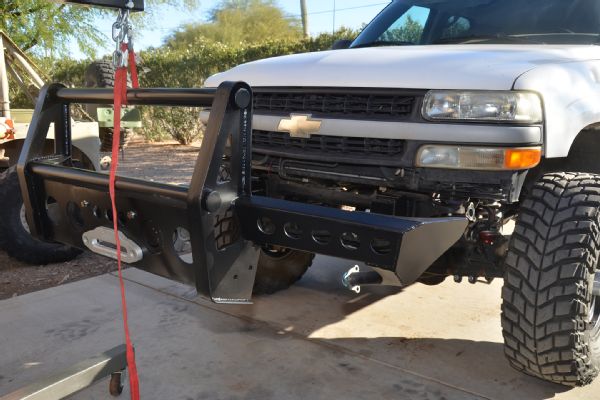
With the winch bolted to the bumper we used our engine hoist to hold the bumper up so we could slide it into place and add the Grade 8 mounting hardware.
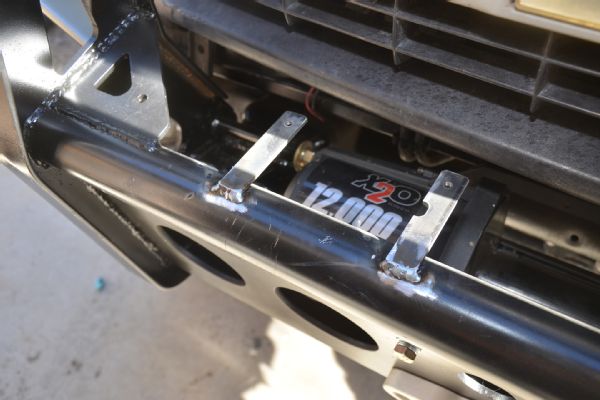
With the winch installed and the bumper in place we decided the best place for the winch’s control pack would be just above the motor on the winch. We mocked up these tabs and welded them in place using our Millermatic 190 from Miller Electric.
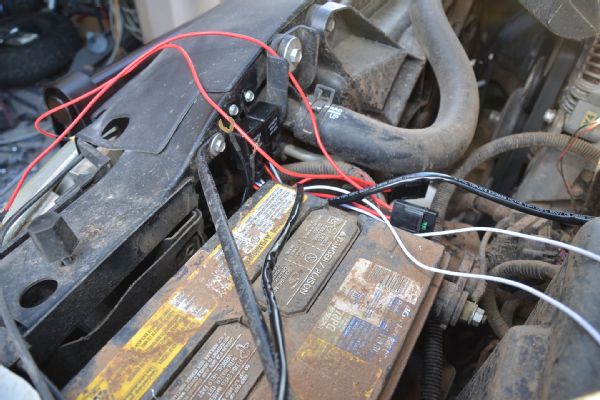
With the winch and bumper installed we set about mounting the Lifetime LED Phantom Sun 3-inch Cube Lights (available as a pair with wiring as a kit, PN LLLPS-23) that we showed you in Part 7. We also had Lifetime LED send another auxiliary wiring kit (PN LLLSWK-0901) for use with our front AAM locker. The wiring kits are fused and come with an relay and switches already wired in. All you have to do is hook up the lights (or locker), a few grounds, a keyed power source, and a constant 12-volt source.
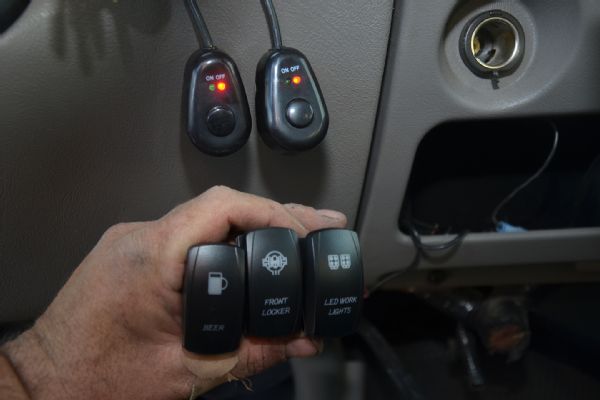
The wiring kits come wired with these smallish stick on switches, but Lifetime LED also has other switch options. There are too many options to talk about, but here are few we got Lifetime to send along for us. One says beer. Beer makes Verne happy.
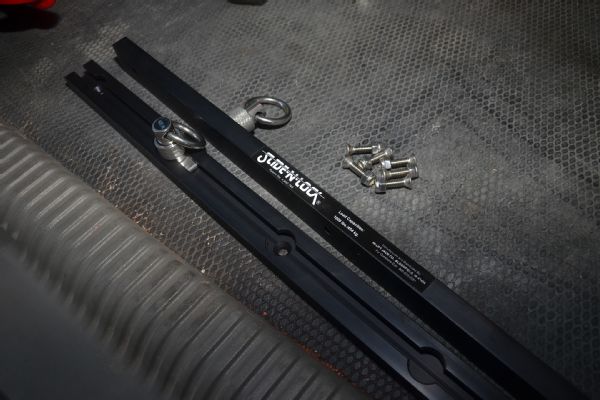
Securing stuff in the back of Rosco P. Drivetrain is going to be very important for those long family backcountry adventures. Most people know Hi-Lift Jack Company for its iconic and very useful line of farm jacks, but Hi-Lift also makes a few other innovative parts for your 4x4. One such part is the Slide-N-Lock tie-down system. Available in 22-, 68-, and 93-inch strips, the Slide-N-Lock is perfect for securing just about any payload. We got four of the strips to place around the bed area of the Tahoe.
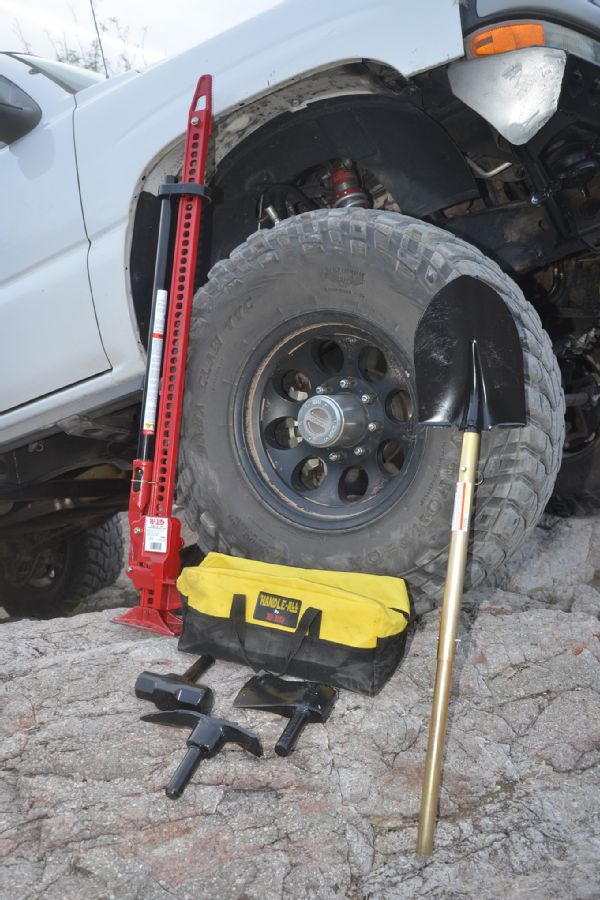
Ah, there she is, the Hi-Lift Jack, something no backwoods adventurer should wander without. We got the all-cast version of the jack powdercoated in bright red. Also in our Tahoe backcountry kit is one more product from Hi-Lift that you might not know about. It’s called the Handle-All, and it is four (or more) tools in one. With a telescoping handle and swappable shovel, axe, sledge, and pick heads, the Handle-All gives us tons of tools we might just need in the middle of nowhere. With any luck we won’t need any of these tools, but it’s nice to know they are there if we do.
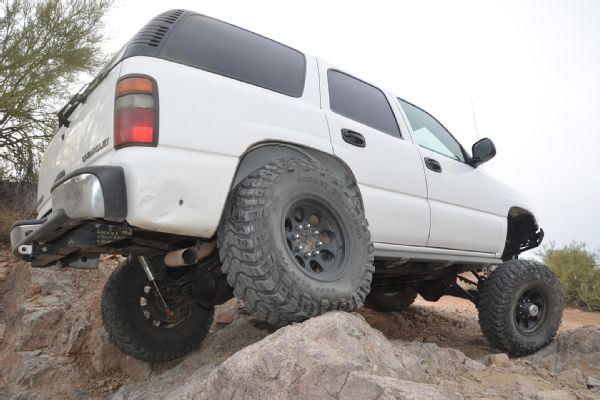
All in all we are very pleased with the way this project turned out. The Tahoe fulfills all of our wants and needs. As for things we would change, there are a few. We should have geared the axles to 4.88 instead of 4.56. We should have modified the factory T-case adapter to accept the 4L60E’s rear speed sensor. As is, with the sensor in the transfer case, the computer is not so happy about low range. We are still working on an electrical fix for this, but in hindsight, having the speed sensor in the adapter would have simplified our build and increased reliability. Also, despite the presence of tone rings and the factory GM sensors in our 2012 AAM 9 1/4 front axle, the ABS system of the Tahoe is not happy. That’s OK with us, having driven non-ABS vehicles most of our lives. If ABS is a must for your SAS Tahoe, custom hubs with tone rings that have the correct number of teeth should solve the issue.