 John Cappa
Former Editor, Four Wheeler
Cracking
In the first part of the flatfender article (“Garage Project GPW.” Feb. ’15), you mention drilling a hole at the end of a fracture so that it doesn’t continue to fracture more. My question is, do you just leave that hole there forever or do you fill it in later on?
Eric McGrew
Via email
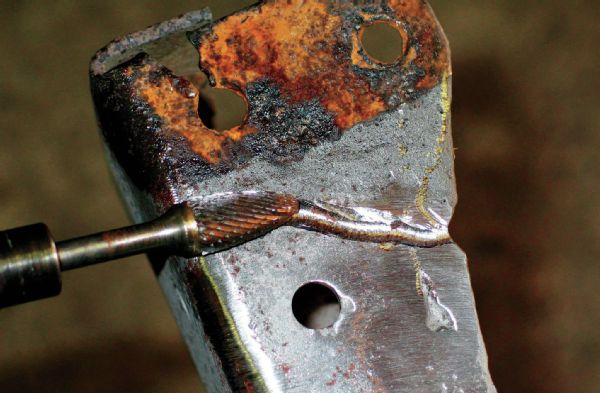
It’s best to weld up the hole with the rest of the notch that you cut with the die grinder. Personally, I usually don’t bother drilling a hole at the end of a crack in a frame. I simply run the welder just a little hotter or massage the weld puddle to fuse the crack together. If the crack keeps forming in a problematic section of the frame, I’ll repair it properly and then add some 1⁄8-inch-thick or 3⁄16-inch-thick plating with fish-mouthed ends to help strengthen the frame and distribute the load. It’s also a good idea to try and figure out what forces are causing the crack to reform in the same area over and over again. There may be other ways to stop it. For example, installing a full cage that is welded directly to the frame can eliminate a lot of flex and significantly strengthen the chassis.
Build My Behind
I’m currently going through only my second issue of Jp magazine, and I am hooked to the point that I plan to be a subscriber soon. The cheap driveway builds fit me perfectly. We are the proud owners of our very first Jeep. We recently purchased a ’04 Grand Cherokee 4x4 with a 4.0L engine. I wanted a Cherokee, but my wife insisted on a few conveniences (automatic transmission, electric windows, and so on). I know nothing of Jeeps mechanically, but after reading “Super-Duty NP” (Feb. ’15), I think we have an NP242 transfer case in our Jeep. I’m hard at work to learn as much about them as possible, but I need some quick advice from a Jeep professional.
Shortly after we purchased the Grand Cherokee, we drove from Michigan to Texas. Right after arrival, gear oil started pouring out of the left rear axle seal. I had the bearings and seals replaced on both sides of the axle. The next day, my wife drove it 260 miles, and at the end of the trip, gear oil was leaking out of the right side. The same shop redid the work and checked the axles and everything in great detail. The techs couldn’t find a problem that might have caused it. Could it be age and wear, as it has just over 140,000 miles on it?
Is there anything at all that you could share with me about these rearends that we need to know? Are there any quirks, problems, fixes, or tricks to make them better?
Nickey Hodges
Via email
Congrats on your first new-to-you Jeep purchase. The ’99-’04 WJ Grand Cherokee is the last of the robust solid-axle Grands and is one of the most sought-after Jeep Grand Cherokees ever produced. With the 4.0L, you could easily spin the odometer to 250,000 miles or more. Generally, it’s the little stuff in the WJ Jeeps that fall apart. You’ll likely find that things like electric window switches and power seats will stop working long before the drivetrain gives up.
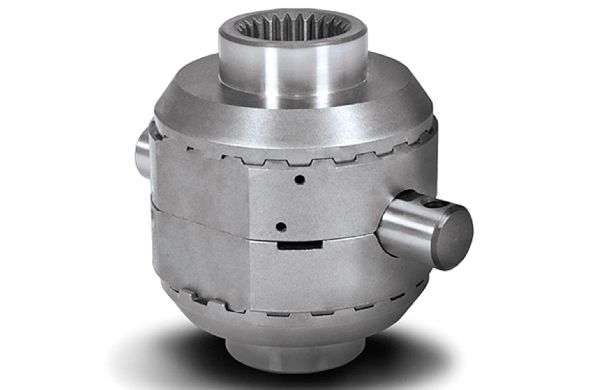
The rear axle in your Jeep is an aluminum Dana 44, sometimes referred to as the Dana 44A or Dana 44HD. The tubes are steel, but they are pressed into a cast-aluminum center section. It doesn’t share parts with the common cast-iron Dana 44 axles. Replacement parts are available, and it’s a durable rear axle when used in stock applications.
Your Dana 44A has what are known as C-clip axleshafts. These axleshafts are retained in the housing with small clips inserted inside the differential assembly. The axle bearings and seals are pressed into the housing, rather than onto the axleshaft like on a flanged axle with traditional bearing retainers. For extreme uses, the C-clip style axles are less desirable for strength reasons.
The reason the other side of the axle started leaking after the bearing and seal was replaced could be caused by any number of things. Generally, a seal being damaged during installation causes a failure on a fresh part like that. However, a worn axleshaft can cause leaks as well. On C-clip axles, the bearing and seal ride on the axleshaft itself. Worn bearings and grimy seals can damage the bearing and sealing surfaces of the axleshafts. If this happens, the axleshafts need to be replaced. This is usually only required on really high-mileage Jeeps or on Jeeps that have had contaminated oil in the axle. In your case, your new seal leaking sounds like a random fluke. You shouldn’t be too concerned.
The aluminum Dana 44 doesn’t enjoy a ton of aftermarket support, mostly because owners will swap it out when building an extreme trail rig. It’s not a desirable axle if you want to run significantly larger tires like 35s. It’s not well known, but the ’85-’97 Corvette and ’92-’10 Dodge Vipers use a similar differential assembly. There are some different gear ratios available ranging from 3.08:1 to 4.56:1. USA Standard Gear (usastandardgear.com) offers a Spartan Locker locking differential for your rear axle if you find that you need more traction off-road. Aussie Locker (aussielocker.com) also offers a drop-in locker similar to the Spartan. These are great entry-level locking differentials that can be installed in your own driveway in most cases. However, these lockers will only fit in a standard open differential case. If your Jeep came with the optional Vari-Loc differentials (which it shouldn’t have with the 4.0L engine), you’ll need to replace the Vari-Loc carrier with an open differential carrier.
Rusty
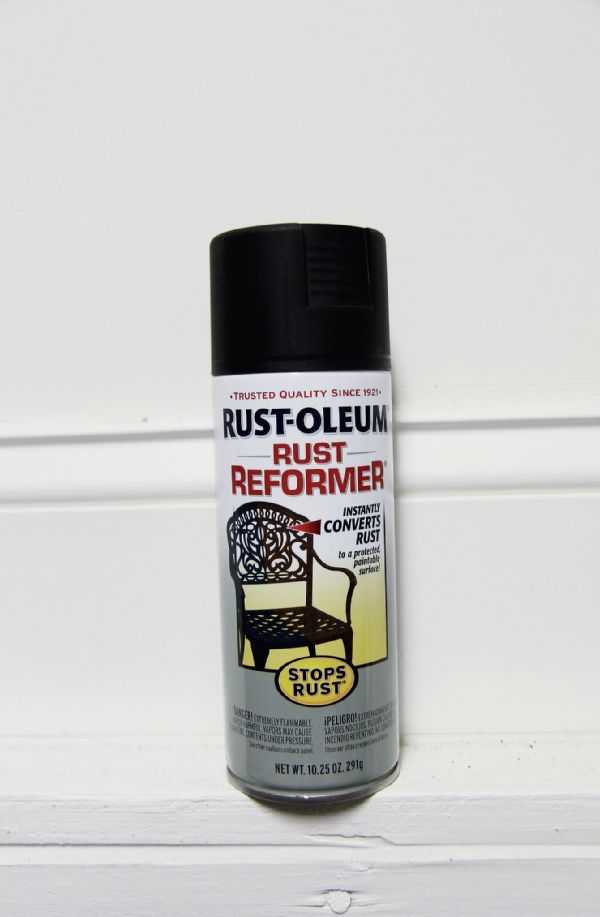
I noticed Ali Mansour mentioned Rust-Oleum Rust Reformer in “Metal Nemesis” (Feb. ’15). Is it a good product?
Tork Toll
Via email
Jp Tech Editor Mansour responds:
I’ve had good luck with Rust-Oleum (rustoleum.com) Rust Reformer. It’s important to spend the time doing the prep work and really getting the area clean first.
After coating the area with Rust Reformer, I typically go back and spray on another coat of paint. It’s not a miracle worker, but for a little rust here and there, it’s a solid product.
Spacer Be Gone
I have a ’00 Wrangler with 2-inch spacers for lift. I want to take the spacers out from the front only and replace them with springs. The current springs sag down about 1.5 inches. What size lifted springs would I need to be level with the back? The Jeep has 32-inch tires and I want 33s. I don’t do a lot of off-roading.
Steve Gillmore
Via email
If the front coil springs are sagging, then it is very likely that the rear coil springs are sagging too. It may be difficult to match the front and rear heights if you use new coils up front and spacers in the rear in conjunction with the factory coils. If you suspect that the front coils are worn, it might be a good idea to upgrade all four coils with some new aftermarket lift coils and ditch the spacers. To fit 33-inch tires, I’d recommend that you step into a 21⁄2-inch lift kit. There are many different basic kits available with lots of options. The minimum I would recommend is four 21⁄2-inch coils with four longer shocks. Other add-ons and options may or may not be necessary depending on your driving habits and personal preference. Be aware that the wider 33-inch-tall tires may rub the front control arms at full steering lock if your wheels don’t have enough backspacing.
Six-Speed Query
I read “TJ Trader” (Feb. ’15) about buying a used TJ and would like to specifically reference the part about the ’06 manual transmission torque rating being reduced from previous years. I’m considering the addition of the Banks Sidewinder turbo to get the added highway power I need for travels to and from the trails. I have considered engine swaps, supercharging, stroking, and so on and have settled mostly on the turbo. Exactly how much torque can the six-speed handle before issues become a major problem? The rest of the Jeep is built very stoutly, to avoid breakage. It has G2 front and rear axles. The rear axle has an ARB and 35-spline axleshafts. A Detroit Locker resides in the front, and both axles house 4.56 gears. The engine has a header and the transfer case has a Tera-Low kit installed in it. I have not had any problems off-road where I felt I needed more power, except for in the sand. I have a tough time maintaining the speed limit on these Nevada mountain ranges. I’m often in Fifth and even Fourth gear at wide-open throttle and can barely maintain the speed limit of 65, 70, and 75 mph. I feel the turbo is the best choice due to ease of install, weight, power, and cost. A V-8 swap will require better springs, brakes, cooling, and so on. What are your thought on this stock transmission? Should I look for an aftermarket six-speed? I don’t want to swap in an automatic because I like the manual off-road.
Chris Mattingly
Via email
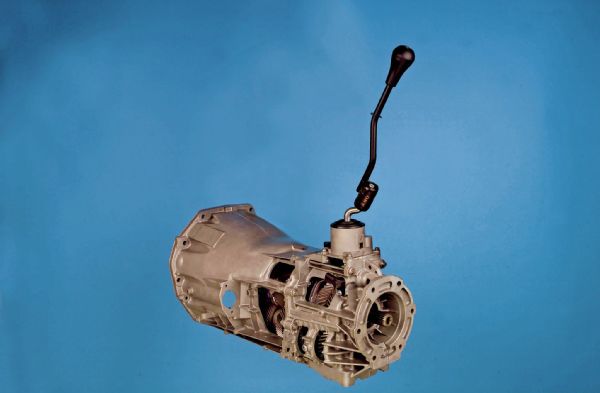
The ’05 six-cylinder TJ was the first Wrangler to receive the new NSG370 six-speed manual transmission that is still used today in the JK. The NSG370 replaced the beefier NV3550 five-speed manual transmission that can be found in ’00-’04 six-cylinder Wranglers. A version of the NV3550 without a removable bellhousing (NV3500) can be found behind V-6 and V-8 engines in Dodge pickups. It’s a relatively strong truck transmission that has some quirky noise characteristics. The NV3550 is rated for 300 lb-ft of torque input. The newer NSG370 is rated for 272 lb-ft of torque input. The Banks (bankspower.com) turbo kit will bump your torque numbers up to about 250 lb-ft, which is well within the capabilities of the NSG370. However, I think that long-term you will see shorter transmission life than you would on a stock Jeep simply because you have the load of larger tires and more input torque. Bearings and other parts will wear more quickly. It’s not a big deal since it’s pretty much expected whenever you add larger tires and more power to any Jeep. The NSG370 will sometimes indicate that it’s due for a rebuild or replacement by popping out of First gear.
Your situation has me wondering what size tires you are running to have a power problem on the highway. If you have 35-inch tires, you probably would have been better off with 4.88 axle gears, although the swap from 4.56 to 4.88 really isn’t a cost effective option. If you are running 37-inch tires, you might consider swapping to 5.13 or even 5.38 gears to remedy the perceived power loss.
Wiry J-Truck
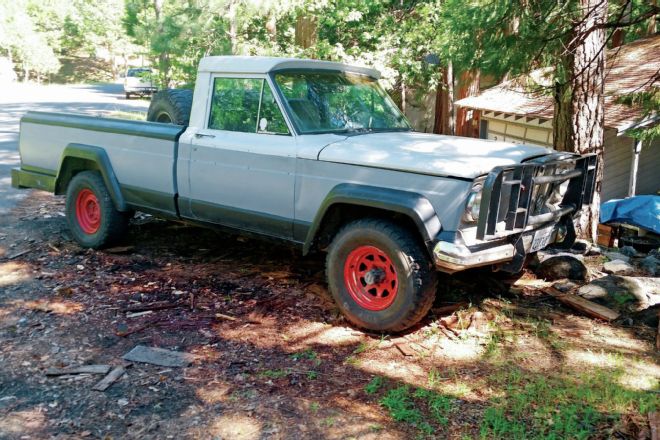
I recently bought an old Jeep pickup for an impassable price of $500. It needs some work, but I have no clue where to start. I fell in love with this truck the moment I saw it and didn’t even think of what it could take to get it trail ready. It is stamped as a ’67 J3000 on the doorplate, but the VIN comes back as a ’68 J3500. It has a busted windshield, leaky brakes, and I had to disconnect and plug the vacuum to the brake booster to get the brakes to work after 6-12 pumps. After we got her home, we realized that there is 6-lug axle on the rear and 5-lug axle on the front. So, I removed the front driveline until I could inspect the differentials to see if the gear ratios matched. The man I got it from had just rebuilt the 327 V-8, so she runs like a raped ape. The wiring has issues. The previous owner was starting it with a screwdriver, so I rewired the ignition mechanism and starter, but nothing else. Sometimes I have brake lights, sometimes tail lights, but never both at the same time. The high and low beam headlights work, but the dash lights and blinkers are hit and miss. If I hit the dash in the right spot, they work.
I somehow convinced someone to trade me a windsurf board I had laying around for a ’74 J4000 with a seized AMC 360 V-8. This truck is in decent shape, aside from the engine. Can I use the ’74 as a parts truck? I have no experience welding or fabricating, but I can turn a wrench. I have a few 4x4 buddies, but they cannot be trusted to work on any rig that isn’t theirs.
So I guess my big finish to this long rant would be where do I start? Can I use the newer truck for things like a full axle swap, interior bits, or windshield? Can you point me in the direction of a repair Manual? I prefer to do as much as I can myself, but I’m sure I will run into a snag or two that a good shop can handle.
Clayton Baker
Via email
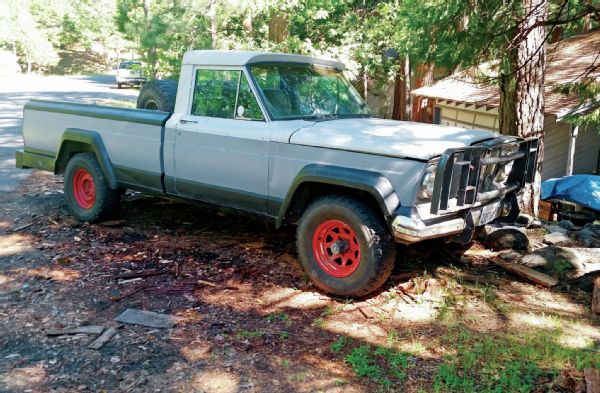
The ’63-’87 J-trucks are generally very durable and versatile. Of course there are some years that are better than others. The ’63-’73 J-tucks have what is called a post-mount leaf spring suspension. While there are some lift kits available from companies such as Hell Creek Suspensions (hellcreeksuspensions.com), these early J-trucks don’t enjoy the same abundance of aftermarket suspension support as the ’74-’87 trucks. The ’74-later trucks have more desirable modern axle assemblies and brakes, but these trucks also have a different spring-perch width in the front, among other things. A front axle swap between your two trucks is not a bolt-in deal. Lots of welding and fabrication is required. It will be far easier to swap in a ’73-older 5-lug FSJ rear axle. A Ford 9-inch from a ’74-’86 F-150 is another possible swap option, but it will require removal of the shock mounts and spring perches so they can be relocated and welded in place to match your Jeep truck.
Many of the interior bits and body parts are swappable from your newer truck to your older truck. The windshield can be swapped as well. It sounds as though you should start with rebuilding the brakes and then attack the wiring. The dash lights are generally an easy fix. It sounds as though the connections are simply dirty or loose, which is not uncommon for the early FSJs. Remove the gauge cluster and carefully remove each dash light bulb. The copper contacts usually need to be cleaned and bent slightly to make a better connection. You might even smear on a little dialectic grease to keep the connection fresh. As for the rest of the wiring, you can either try and clean up the existing wiring in the truck or use an all-new universal wiring harness from a company such as Painless Performance Products (painlessperformance.com) or BJ’s Off-Road (bjsoffroad.com). BJ’s Off-Road also offers reprints of factory service manuals for your trucks and many other FSJs.
Solid Steering Gear
Hey guys, I really like Jp magazine. I depend on it for information to help me with my Jeep. Could you tell me how to find information about the ‘56 CJ-5 you rebuilt? Especially where and how you mounted the steering gearbox. I unfortunately lost that issue and would be eternally grateful if you could help.
Dan Haertling
Via facebook.com/jpmag
The Saginaw steering box on Project Ground Up was attached to the frame using heavy-wall DOM tubing that pierced the custom garage-built framerail. This is probably the strongest way you can attach the steering gear to a box-tube Jeep frame. However, it requires a bit more fabrication skill than using an Advance Adapters (advanceadapters.com) steering box mount (PN 716838) or complete early Jeep power steering kit (PN 716806).
Finding the correct location for the steering gearbox will depend on many factors. You’ll need to leave enough room for a steering shaft, the power steering hoses, and the pitman arm. Pretty much every early-Jeep steering box installation is different because you have to take the location of the tie rod, axle, grille, radiator, motor mounts, steering column, and more into consideration before cutting and welding anything. It’s a good idea to clamp the box in place for a mock-up while you check for clearance. You can find more images and info about Project Ground Up on fourwheeler.com —just use the search box. You’ll find the steering gear mounting details among other things in Part 2 of the series.
Mounted
In “Leafs Out, Coils In” (Mar. ’15), am I missing something? I have built a four-link on my street rod pickup on the front and on the rear of a Jeep. I am getting ready to build a ’52 M38, and I am putting a four-link on the rear. All the joints are hooked horizontal to move up and down. In your pictures the upper arms are bolted vertically to the axle truss and to the frame mount. How does it move up and down? The lower arms and shocks are bolted in horizontally. Please clue me in.
Glenn Martin
Via email
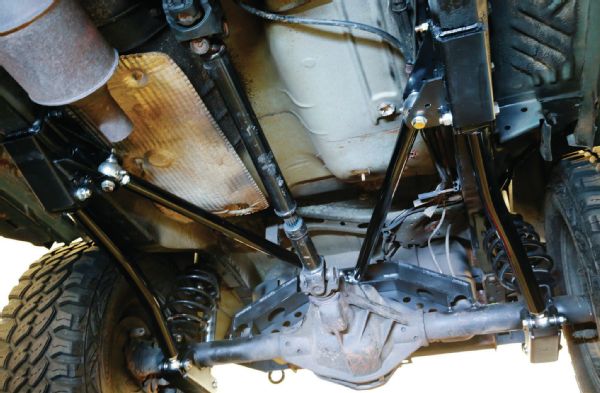
There are many different ways to properly build a four-link suspension. On this particular suspension kit, the ends on the upper suspension links feature misalignment spacers. These spacers allow much more movement in the joint than a traditional straight spacer, usually up to and over 45 degrees. This is plenty of movement for the suspension to cycle properly. It appears to have been built this way to simplify packaging and for easier access to the mounting hardware. As long as the joints don’t bind when the suspension is cycled, this is a perfectly acceptable practice.
While not true in this case, there are some suspension designs where this vertical mounting is actually preferred over horizontal mounting. The reason being is that rod ends are weaker when an axial load (pushing sideways through the bore) is applied instead of a radial load (pushing along the axis of the shank). You should always mount rod ends with the forces applied as a radial load for longer joint life and ultimate strength.
Write Us!
Got a tech question you’re just itching to get answered? Send it on in to Jp Magazine, Your Jeep, 831 S. Douglas St., El Segundo, CA 90245, or e-mail it to [email protected].