 Kevin Blumer
Contributor
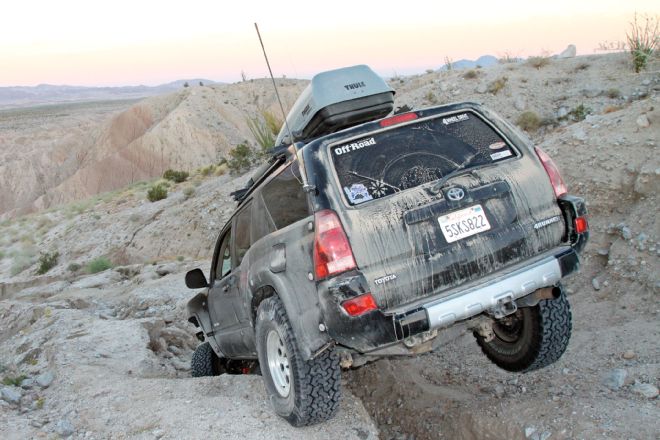
We were stuck. Recent rains had ripped through the Anza-Borrego desert, leaving deep ruts in a normally smooth section. Our chosen line had taken us into a spot where the left front and right rear tires were clawing at little more than air. Forward motion ceased once those two tires lost traction.
Eventually, we got our 2004 Toyota 4Runner moving again, but that rutted section would’ve been so much easier if we’d had a traction-aiding differential in one or both of our axles. Oh wait, we did! In fact, there was an ARB Air Locker installed in the rear axle, but we hadn’t yet hooked it up to the ARB compressor! Without compressed air, the Air Locker functions as an open differential.
That’s the beauty of the ARB Air Locker. Unlocked, it’s completely transparent. Steering is easy and tires don’t scrub or prematurely wear. This is perfect for the pavement and for mellow off-road situations. When locked, the Air Locker becomes a spool, turning the axleshafts in perfect unison. Street or dirt, ruts or rocks, the ARB Air Locker offers perfect function to fit the situation. There are no compromises.
Being stuck was no fun, but it provided motivation to finish the ARB installation. Our already installed rear third member was built by Currie Enterprises (“A Diff for all Occasions,” April ’13). To install our front locker, we turned to American Gear Shop in La Habra, California. With both front and rear Air Lockers in place, we spent some quality time in the driveway installing the ARB compressor, air lines, and wiring.
Installing the compressor, air lines, and wiring is a straightforward process. ARB provides an excellent instruction sheet with boxes to check off as each step is completed. Before you tackle the installation, take time to study the instructions. Plan on taking at least one weekend to complete the installation; more power to you if you’re faster. If it’s too daunting a task, there’s no shame in calling a buddy or paying a professional. With our Air Locker system fully installed and functional, we’ve got a no-compromise traction system on board. It’s time for a re-match with that rut.
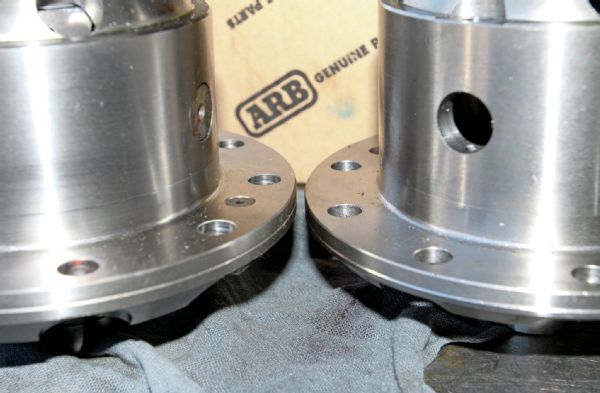
In our 4Runner’s front differential, (which is shared with the FJ Cruiser and the 2005-current Tacoma) there is a carrier break between the 3.73 and 3.90 gear ratios. Our 4Runner came with the 3.90 ratio and carrier. As such, we ordered 3.90-carrier-style 4.88 gears and a matching ARB RD 111 carrier. We received the ARB RD 111 (at left) Air Locker, and then discovered Randy’s Ring & Pinion only had 4.88 “thick” Yukon gears (made for the 3.73 carrier) at the moment. ARB offered a solution and sent the outer case and flange for an RD 121 (3.73 and down) carrier.
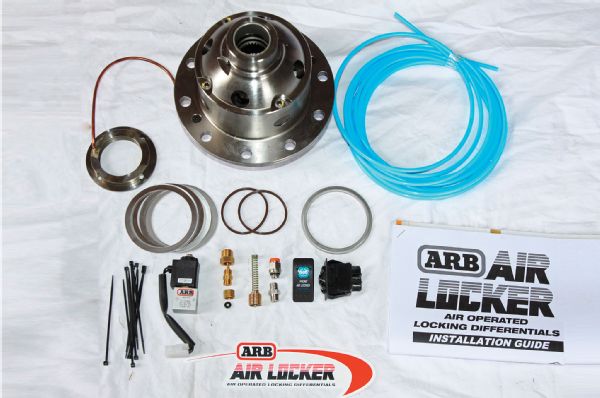
ARB’s Air Locker uses a full carrier replacement selectable locker. Not only do you gain the traction advantages of the Air Locker, you also gain strength over the factory differential case. The Air Locker kit also includes the air line, compressor solenoid, fittings, and switch.
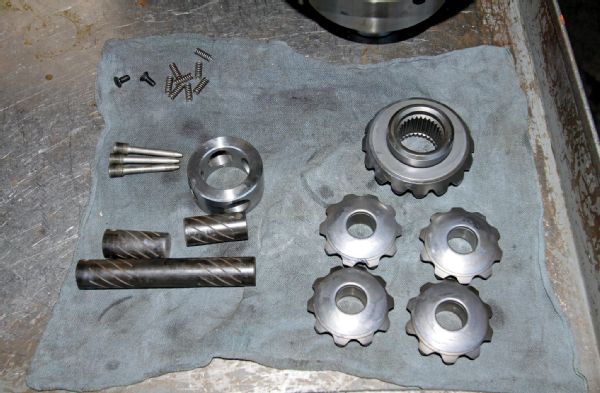
Hector swapped the ARB internals from the RD 111 case into the RD 121 case. This gave us the opportunity to check out the parts that make the Air Locker unique. The Air Locker uses a four-pinion system, as opposed to the two-pinion system employed by most stock differentials.
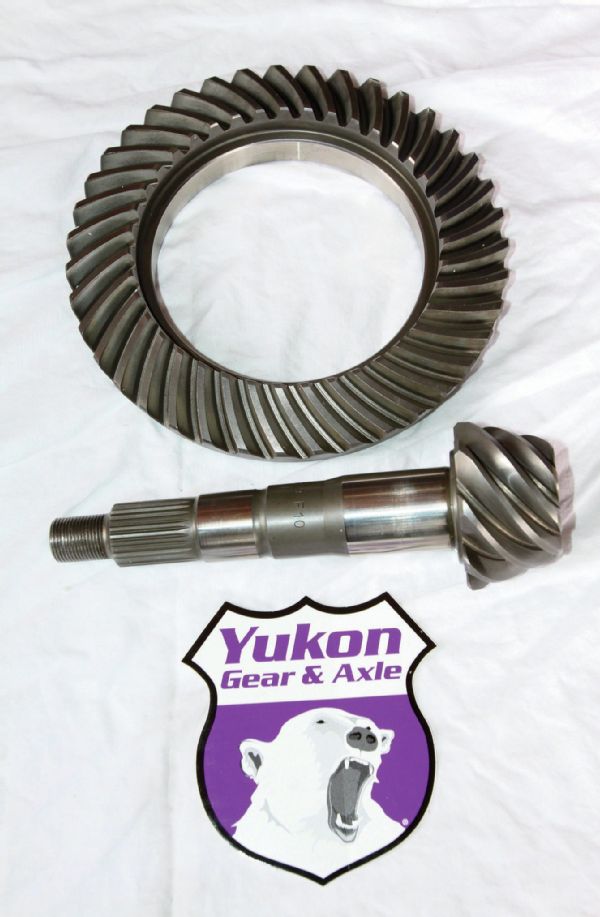
We turned to Randy’s Ring & Pinion for our Yukon gears and installation kit. A 4.88:1 ratio was chosen as a good match for our 35-inch tires. The installation kit comes complete with bearings, crush sleeves, shims, ring gear bolts, seals, thread locking compound, gear pattern marking compound, and a marking compound application brush.
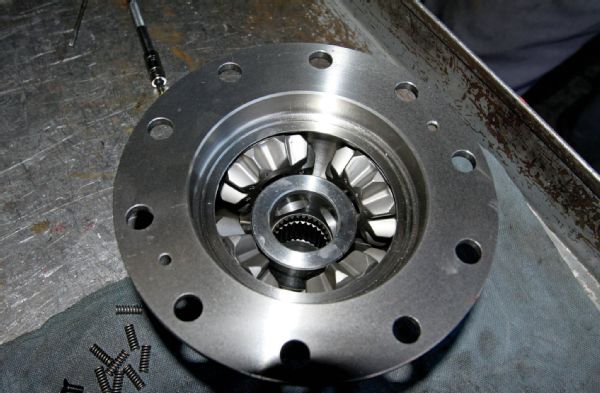
The four-pinion gears index onto a central ring. They’re held in place by a full-length cross-shaft and two stub shafts. The stub and cross-shafts are secured to the gearcase with set screws.
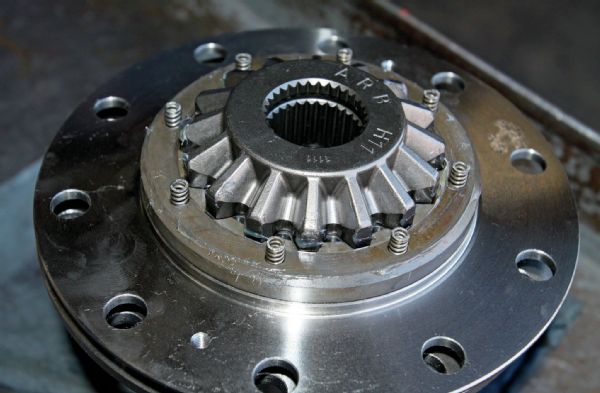
Here’s the business end of the ARB Air Locker. When pressurized, the ring surrounding the side gear moves upward. This locks the side gear and prevents it from rotating. When the side gear is locked, it in turn locks the internal gears and the opposite side gear in place. When air pressure is released, the small coil springs return the ring to its original position and allow the side gears to rotate.
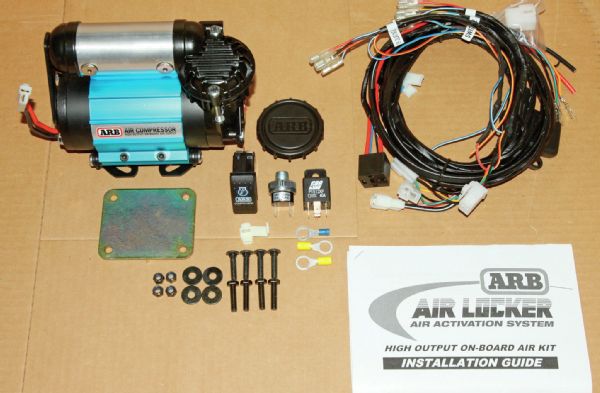
With the front and rear Air Lockers in place, it was our turn to spin wrenches and install the air compressor, wiring, and air lines. ARB offers several compressors to choose from. We opted for the CKMA12. Its compact design allows it to be mounted in several positions, and it can inflate tires in addition to powering the Air Lockers.
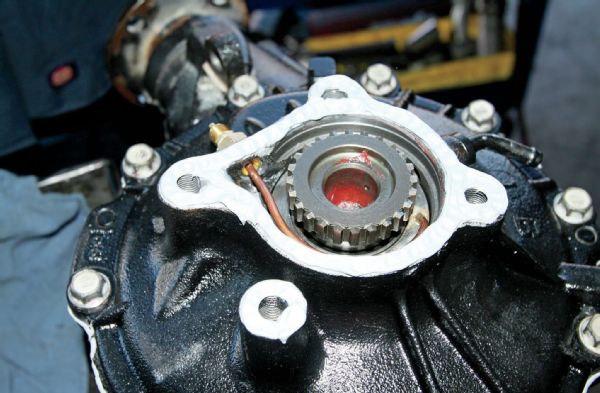
The copper air line attaches to the Toyota clamshell housing via a bulkhead fitting. The hole for the bulkhead fitting must be drilled and tapped into the housing.
ARB provides a mounting plate, which works well on a flat mounting surface. Our chosen location atop the passenger’s side fenderwell was anything but flat. We used the ARB plate as a template for a custom-fabricated three-legged mounting bracket.
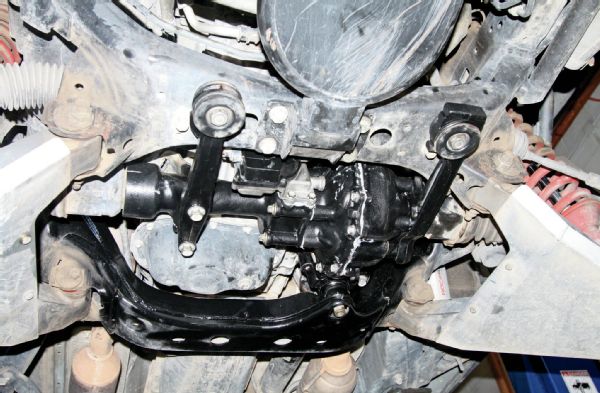
Dropping the IFS front diff back in place takes time, but is relatively easy. We shot some gloss-black paint onto the differential and frame crossmember to freshen things up.
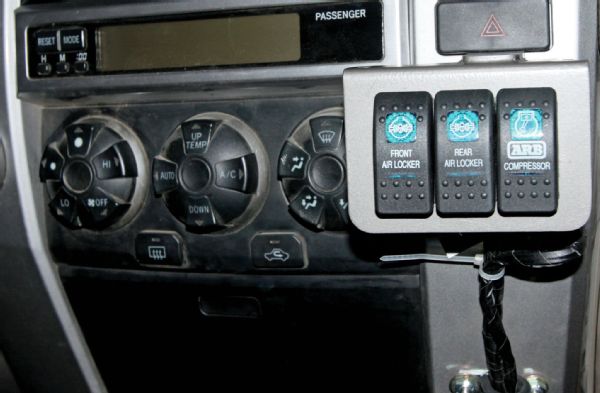
We took an ARB ALSB3 three-switch mounting panel and integrated it into a custom mounting bracket. The custom switch bracket bolted onto the dashboard next to the HVAC controls. This is a great way to go if you don’t want to tear your dash apart.
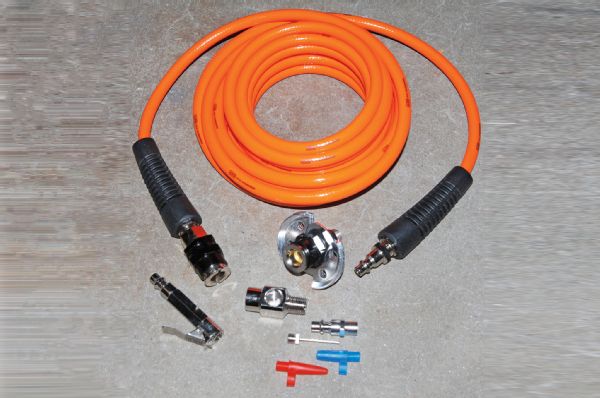 Since the CKMA12 can handle inflation duties in addition to actuating the Air Lockers, we opted for the ARB Pump Up Kit. The air chuck threads into an adapter fitting between the air compressor and the pressure switch. Extra fittings let you pump up sports balls in addition to tires. Twenty feet of orange hose can reach every corner of most vehicles.
Since the CKMA12 can handle inflation duties in addition to actuating the Air Lockers, we opted for the ARB Pump Up Kit. The air chuck threads into an adapter fitting between the air compressor and the pressure switch. Extra fittings let you pump up sports balls in addition to tires. Twenty feet of orange hose can reach every corner of most vehicles.
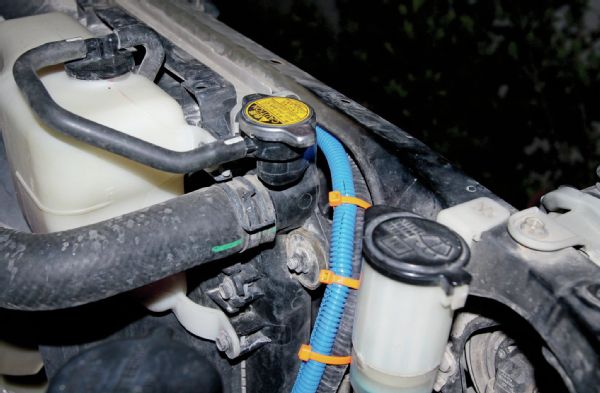
We started the wiring harness installation by connecting to the compressor and branching out from there. Blue plastic split loom tubing was wrapped over the main power wires for extra protection. The most direct route to the battery was across the radiator core support.
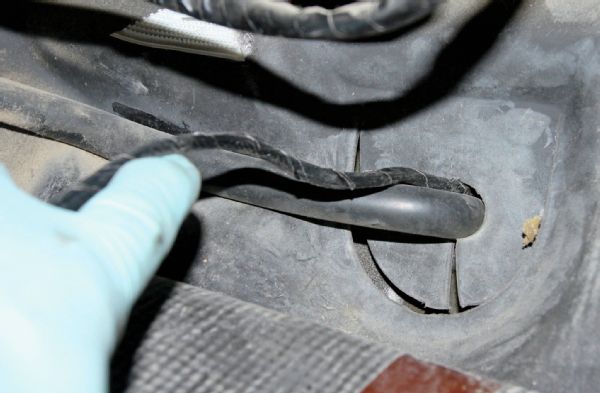
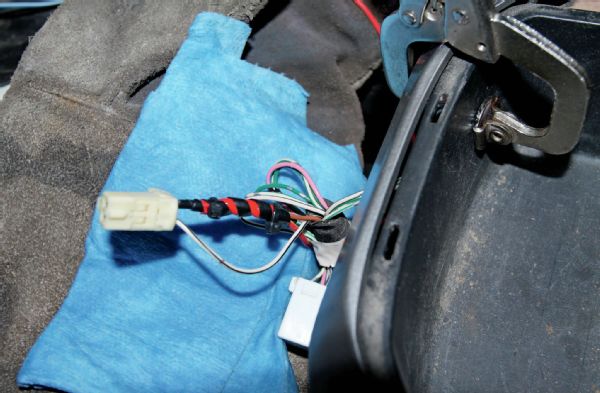
The wire from the compressor to the switches has to pass through the firewall. Rather than bore a new hole, we snaked the wires through the port for the HVAC drain tube.

A key-on power source has to be found and tapped into. A cigarette lighter port is the easiest place to find one, and there was such a port in our center console. ARB’s instructions advise soldering the wire into place. After the soldering was complete, we wrapped the solder joint in electrical tape and plastic spiral wrap. A zip tie at each end cinches everything in place.
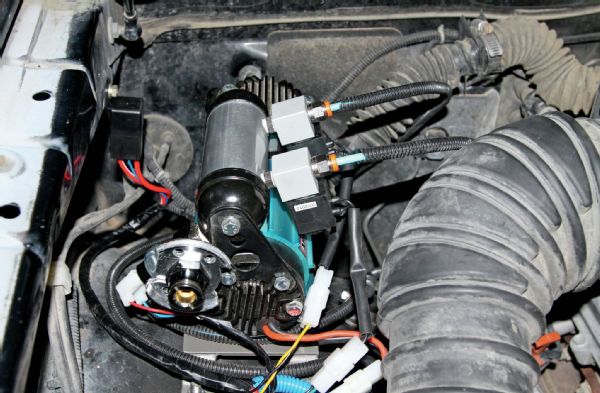
The compressor body can be rotated within the blue-anodized aluminum sleeve. In addition, the mini air tank and end cap can be rotated as needed. This makes the CKMA12 extremely adaptable and versatile. Hood clearance must be factored in, which is why the solenoids are facing downward.
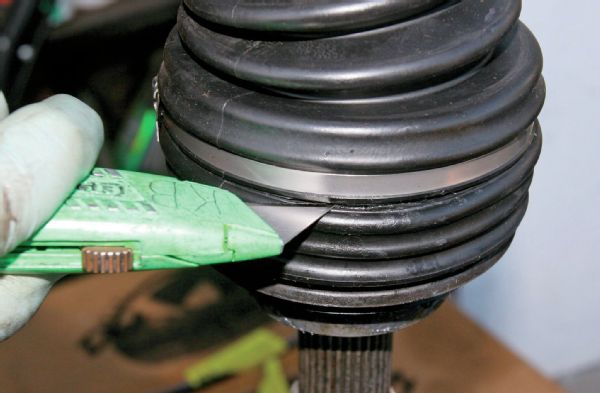
What do CV boots and suspension pivot parts have to do with Air Lockers? It’s a good idea to inspect other nearby parts while you’re working. Preventive maintenance beats remedial repair every time. The suspension bushings and uniball bearings are part of the Total Chaos suspension systems adorning the front and rear of our ’Runner. The Dorman cut-to-fit CV boots seal better than the stock Toyota outer boots. The Dorman part number is 614-003.